While all raster images are just giant rectangles full of pixels, there are many ways to store, display and compress this information. These different methods of organizing digital information are called file formats.
Each raster image editor has its own file format. For Photoshop, it's called "Photoshop Document" or ".PSD". In GIMP, they're called ".XCF" files. While you're creating your raster art, you should use the native file format that matches your program. This will give you access to all of the features and flexibility of your editing environment, while maintaining the highest image quality.
But when it comes time to publish your work, or turn it in to your teacher, you want to create a file that is small, portable, and convenient. For most raster images, the file format you want to use is JPEG, which ends with a ".JPG". You've probably seen this type of file before: almost every camera or smartphone stores images in JPEG format, and there are billions of JPEGs on the internet.
Since JPEG is meant to work on the internet, it uses image compression to make the image size smaller. In this case, that means JPEG compression tries to find pixels that aren't as important to the overall image, and throws them away. Once JPEG compression gets rid of your information, it's impossible to get it back. Look at this comparison of a lightly compressed JPEG image, and a highly compressed JPEG.
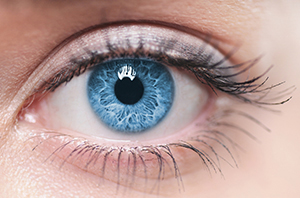 This JPEG compression uses maximum quality to keep as much detail as possible. |
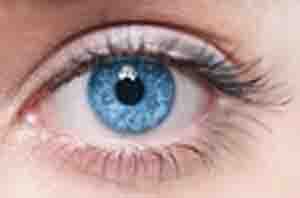 This JPEG compression uses the lowest quality, and sacrifices lots of important information to make a smaller file size. |
To make sure your beautiful artwork keeps as much information as possible, always save a version of your original document in its native file format. Then, go to File>Save As..., and choose JPEG.
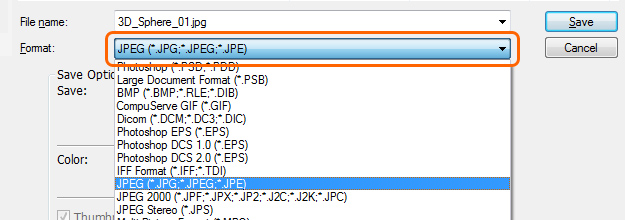 There are many file formats to choose from. Make sure you pick JPEG for images you want to publish or turn in. |
When you choose to save your work as a JPEG, the program will ask you how much you want to compress your image. Make sure to pick maximum image quality.
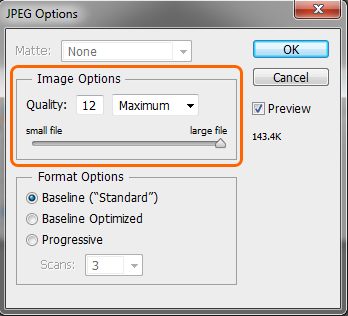 Move the slider all the way to the right to choose the highest image quality possible, then click OK. |
Save a copy of your finished 3D sphere as a JPEG, because you'll be turning it in on the next page.
