Learning to see light and shadow takes real effort and concentration. Shading a drawing does not mean scattering a few meaningless smudges here and there. It means learning to see which surfaces face the light and also which surfaces turn away from the light into shadow.
Do the following experiments to see if you can see the difference in tone when a flat paper surface faces the light or turns away from the light.

Set a lamp on a table (or use a window during daytime light). Hold a sheet of white paper on the table directly facing the light. Notice how bright the white tone of the whole surface of the paper is when it receives this direct light.
Now turn the paper at right angles so that the light does not shine on its surface directly.

Can you see how much darker the whole tone of the paper looks when it does not receive the direct light?
Repeat this experiment several times, until you can clearly see the difference between the light and shadow tones as you turn the paper toward and away from the light.
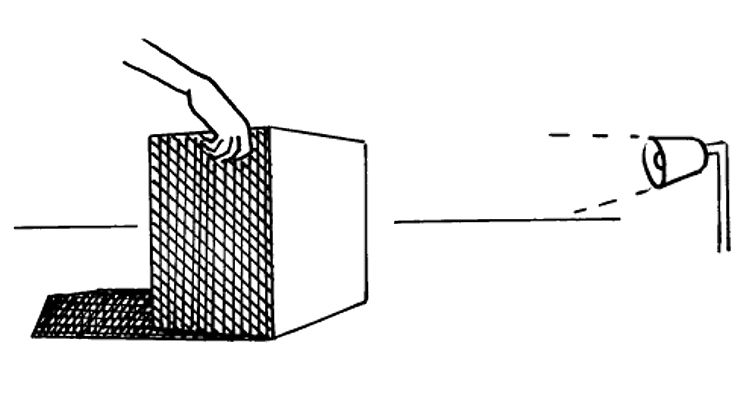
Next, fold the paper in half with a sharp crease, so that it will stand up on the table with the halves at right angles to each other. Set it in front of the light so that one surface faces the light directly and the other half is in shadow.

This makes it easier to see how a strong light can divide a solid object into two tones: a light side and a dark side.
Can you see how the surface tone of the paper turns sharply from a light tone into a shadow tone exactly at the corner fold?
Stand where you can see the two sides from the corner angle: half-close your eyes (squint) so that you can distinguish more clearly the separation of the light side from the dark side at the corner fold. It is at the corner fold where the surface begins the darker tone.

When you can see the light surface and the shadow surface, squint your eyes and look down where the table surface meets the shadowed paper side.
Can you see a distinct dark shadow line on the table?
Can you see that this “cast shadow” on the table begins right at the corner where the paper assumes a darker tone?
On gray charcoal paper, draw the folded paper as it is standing on the table. Draw the surface that faces the light in white strokes (crayon), and the surface that is a darker tone in black strokes (crayon). Draw the cast shadow on the table surface also, making it in black strokes. Form these light and dark tones with closely-spaced lines of the crayon as you did in the value scale earlier in the course. (Do not try to fill in solid tones).
Once you have completed your project, scan or photograph it and submit it to your teacher.
Review the rubric below to see how you will be graded on your assignment for this lesson.
| Superior 5 points |
Average 3 points |
Poor 1 point |
|
|---|---|---|---|
| Quality | Your final project shows considerable attention to using your crayon or color stick effectively. There are no stray marks or smudges. | Your final project shows an attention to using your crayon or color stick effectively. A few barely noticeable stray marks or smudges. | Your final project was put together sloppily. Smudges, stains, rips, uneven edges, and/or stray marks are evident. |
| Use of Values | Your design uses dark, medium, and light values to creates a feeling variation. Items are colored to show a distinction between objects. | Your use dark, medium, and light values in your design is good and somewhat varied. There is some distinction in the design between items. | Use of dark, medium, and light values is poor and uniform. There is no sense of distinction in the design between items. |
| Use of Light and Shadow | Your design illustrates light, shadow, and depth in a way that shows exceptional effort in completing your project. | Your design illustrates light, shadow, and depth in a way that shows an acceptable effort in completing your project. | Your design illustrates light, shadow, and depth in a way that shows minimal effort in completing your project. |
