Regardless of class, mollusks typically have three regions: a head, a foot, and a
visceral mass. The variations in the body plan of each class of mollusk are the very
reasons they are classified the way they are. Click through the slides below to learn
about the different parts of a mollusk and learn a bit about the variations between the
classes.
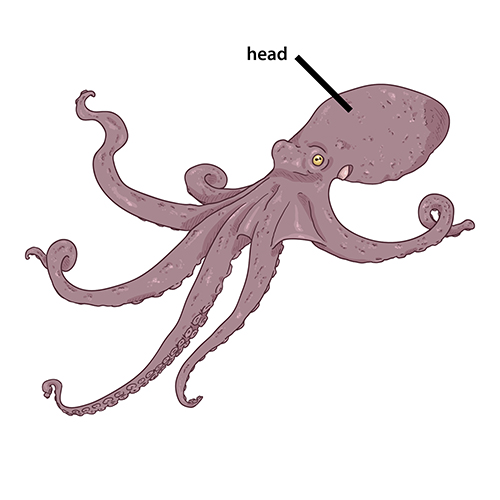
Head
A mollusk has a head that contains the brain. In some
species, particularly the bivalves, the head isn’t clearly seen. In
cephalopods--like the octopus shown--the head is easily distinguishable.
They have relatively large and complex brains that can solve problems.
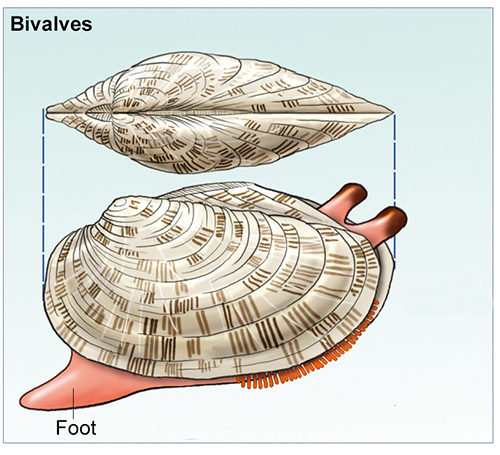
Foot
Most mollusks have a single foot (or wide, flat muscle)
that is used for movement. This foot assists them in burrowing in the
sand or mud (as many shelled mollusks do) or sliding along the ground
(like slugs and snails do). In mollusks related to the squid, this foot
is divided into tentacles that are used for feeding and for movement.
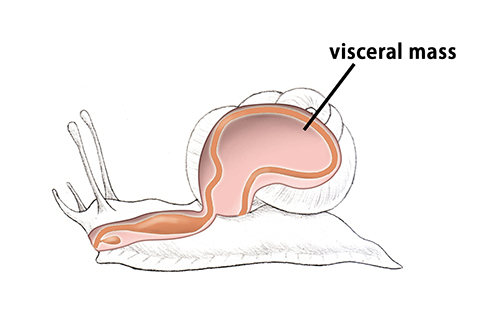
Visceral Mass
The visceral mass is made up of the digestive,
reproductive, excretory, and respiratory systems. It contains all of the
mollusk’s organs, including a heart and kidneys. The digestive system
includes a mouth, a digestive tract, and an anus. Mollusks do not have
lungs; they breath through gills if they live in water or a membrane
that acts like a lung if they live on land.
A gastropod’s visceral mass is always contained within the shell.
From the visceral mass comes the mantle.
Mantle
The mantle is a layer of skin that surrounds the soft
body tissue. In clams, oysters, mussels, and snails, the mantle produces
their hard shells. In squids and octopuses, the mantle is soft and helps
the animal move through the water. Slugs don’t appear to have shells,
but there is a soft one just below the surface of their skin.
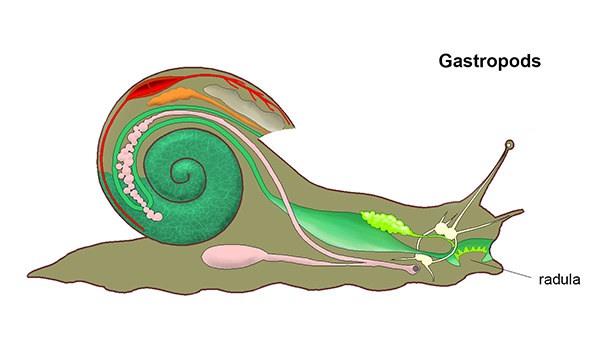
Radula
Most mollusks also have a tongue-like organ called a
radula that is used for scraping food from rocks or
other objects. Cephalopods and gastropods have them, but not bivalves.
Bivalves, such as clams, oysters, and mussels, filter food particles
from the water with their gills.
Slide: 1/5
Reflection
Question
What makes mollusks unique from other phyla?
Mollusks have three special structures: the head, the foot, and the visceral mass.
Text
Guided Notes
Tutor
Video
How To
Meet your new study partner! With our powerful Student Tools, your online learning experience just got more accessible,
personalized, and thought-provoking than ever before!
Do you feel like you learn better when you watch videos? You’re not alone!
Research shows instructional videos can make learners more engaged and active in online classes,
when compared to text-only lessons.
Student Tools lets you turn some lesson pages into videos instantly! Just click the Student Tools tab and select Video.
Remember, video instruction is not available on every lesson page.
Go back to the lesson page any time by closing the Student Tools window.
Sometimes when you learn, it can feel like you’re just not getting it. Maybe you don’t really know what all the words on
the page mean, or you have to read a paragraph two or three times to understand what it’s about.
If this happens to you, just click the Student Tools tab and choose “Text.” This will automatically
simplify the instruction, making it easier to understand and remember.
Go back to the lesson page any time by closing the Student Tools window.
The science is in, and taking notes is one of the best ways to reinforce your learning.
Notes work even better when you write them by hand, since you’re more likely to put complex new ideas
in your own words and remember them longer.
You can quickly and easily access guided notes, as well as key lesson vocabulary,
by clicking Student Tools > Notes. Choose a PDF or Word Doc,
and fill them out online -- or even better-- print them out and take notes by hand!
Go back to the lesson page any time by closing the Student Tools window.
Imagine a teacher you can contact anytime, who is happy to answer all your questions and
knows pretty much everything in the world about the subject you need help with.
Say, “Hello!” to your Tutor! Click on Student Tools > Tutor, and ask any question about your class.
Your Tutor is super smart! You can ask the Tutor to explain things more clearly, make connections
between ideas, or even give you custom quizzes and feedback. You can click the links under References to learn more.
Go back to the lesson page any time by closing the Student Tools window.
Student Tools lets you create your own Flashcard decks to help you study. To get started, click Student Tools >
Flashcards. Press Add New Set and give it a title.
Now, decide what will be on the front and back of your first card. It can be a term and definition, a challenging question,
or even a funny phrase that helps you remember something. Click Add Card to Set to make a new Flashcard.
You can delete sets or cards by clicking the trash can icon. When you’re done, click Save Cards to Set.
Now you can Review your deck. Read the front of the card, and think of the answer. Even better, say your answer out loud! Then, click the card to flip it over.
Depending on how you did, you can either keep that card in the deck to study again by clicking Next or Previous, or if you got it right, click remove.
Remember to review your flashcards often, space out study sessions, and keep practicing until you know them all!
Go back to the lesson page any time by closing the Student Tools window.