Sketch
Now that you have learned about the different types of perspective, it is time to practice each one. You will need a ruler for this project. Follow the directions given to make each drawing.
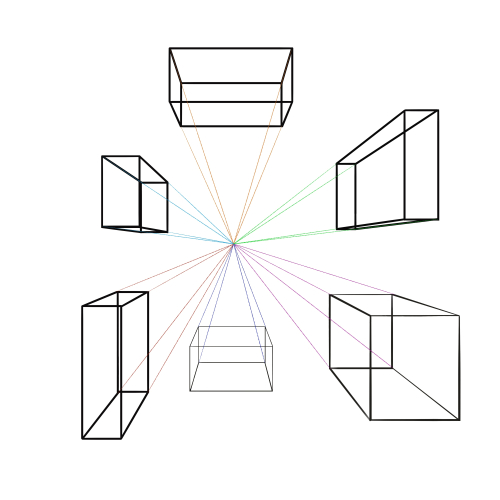
Linear Perspective
- Draw a horizontal line on your page. Make sure it is straight and level. The easiest way to do this is to measure down the same amount on each side of the page and make a mark; then connect these marks.
- Place a dot on your horizon line; this will be your vanishing point. It can be placed anywhere on the horizon line, but the middle is the easiest location for this drawing.
- Now, draw five geometric forms (cubes, rectangular prisms, pyramids, etc.) by drawing the base shape and then connecting all horizontal lines on the same side as the vanishing point to that point. (See the example below.) HINT: Cubes and rectangular prisms are the easiest if you are struggling with this concept.
- Using vertical and horizontal lines, cut off the back end of your shape and erase the rest of the lines leading to the vanishing point. This will make your form look like it is floating or flying through space.
- Try adding color and shading to your drawing to make your forms stand out!
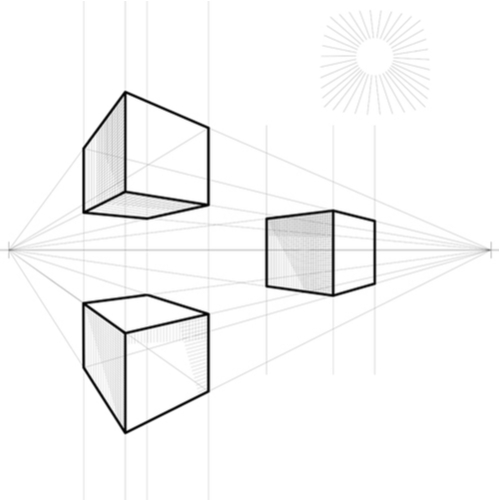
Two-Point Perspective
- Make a horizon line. This time add two dots spaced apart from each other. The dots should not be on the same side of the horizon, and they should be at least a few inches away from each other. It is easier if they are further apart.
- Now you will be starting with a vertical line as you will see the corners of each of your shapes. After drawing your line, start at the top and draw a line to the vanishing point on that side of the horizon line. Do the same on the opposite side and the bottom of your line. Now add vertical lines somewhere down the line to show the next corner. You would then do the same on these lines on the top or bottom, depending on if your shape is above or below your horizon line. (See the example below.)
- Y3. Again, draw at least five geometric forms and add color and shading.
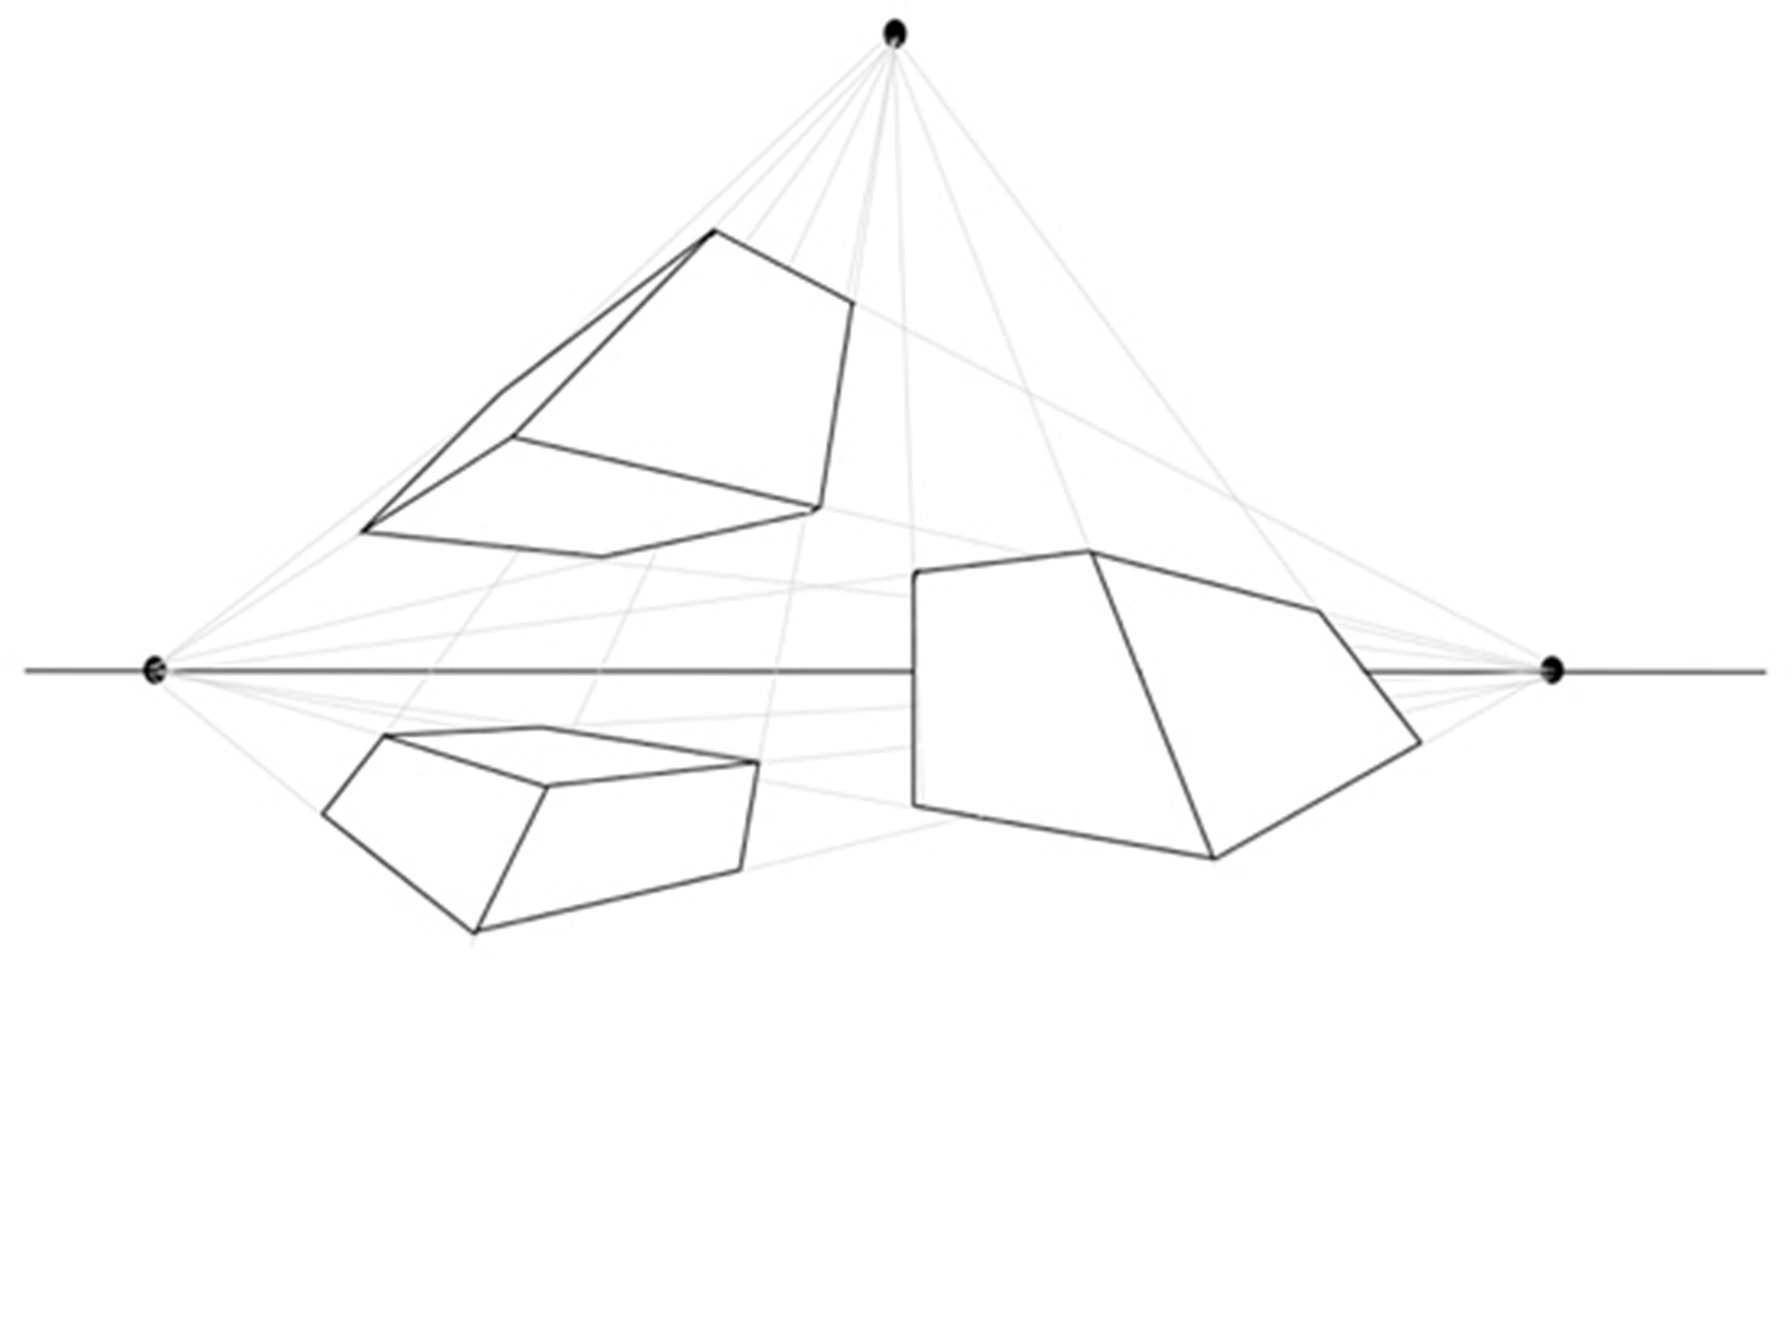
Three-Point Perspective
- Start the same way you did for the two-point perspective drawing and add a third vanishing point either at the top middle or bottom middle. This vanishing point will NOT be on your horizon line. It’s a good idea to place it far from your horizon line as this will give you more room to draw.
- Draw a vertical line towards your third vanishing point. If you start your line further off to the side of your horizon line, it will have a sharper angle than if you start your line towards the middle.
- Now create horizontal lines that go toward one of the other two vanishing points. Cut off the back of your form with another vertical line that goes toward your third vanishing point. (See the example below.) Make sure that all your lines are going to one of your three vanishing points!
- Draw at least five geometric forms, and be sure to add some color and shading to your artwork to make it look great!
Post your drawings on the Art Discussion Board and check out the work your classmates have posted. Maybe you will be inspired by something a classmate created! Let them know if you are!
