Learning Coach —
Objectives
Students will:
Skills Needed
Students must be able to:
Materials Needed
Students will need:
Keywords
Learning Coach Notes
Making a Beaded Dragonfly
Here are the step-by-step instructions.
Goal:
Goal:
The dragonfly is a little easier to make than the dinosaur. Click through the slideshow and follow the directions to make your bead dragonfly.
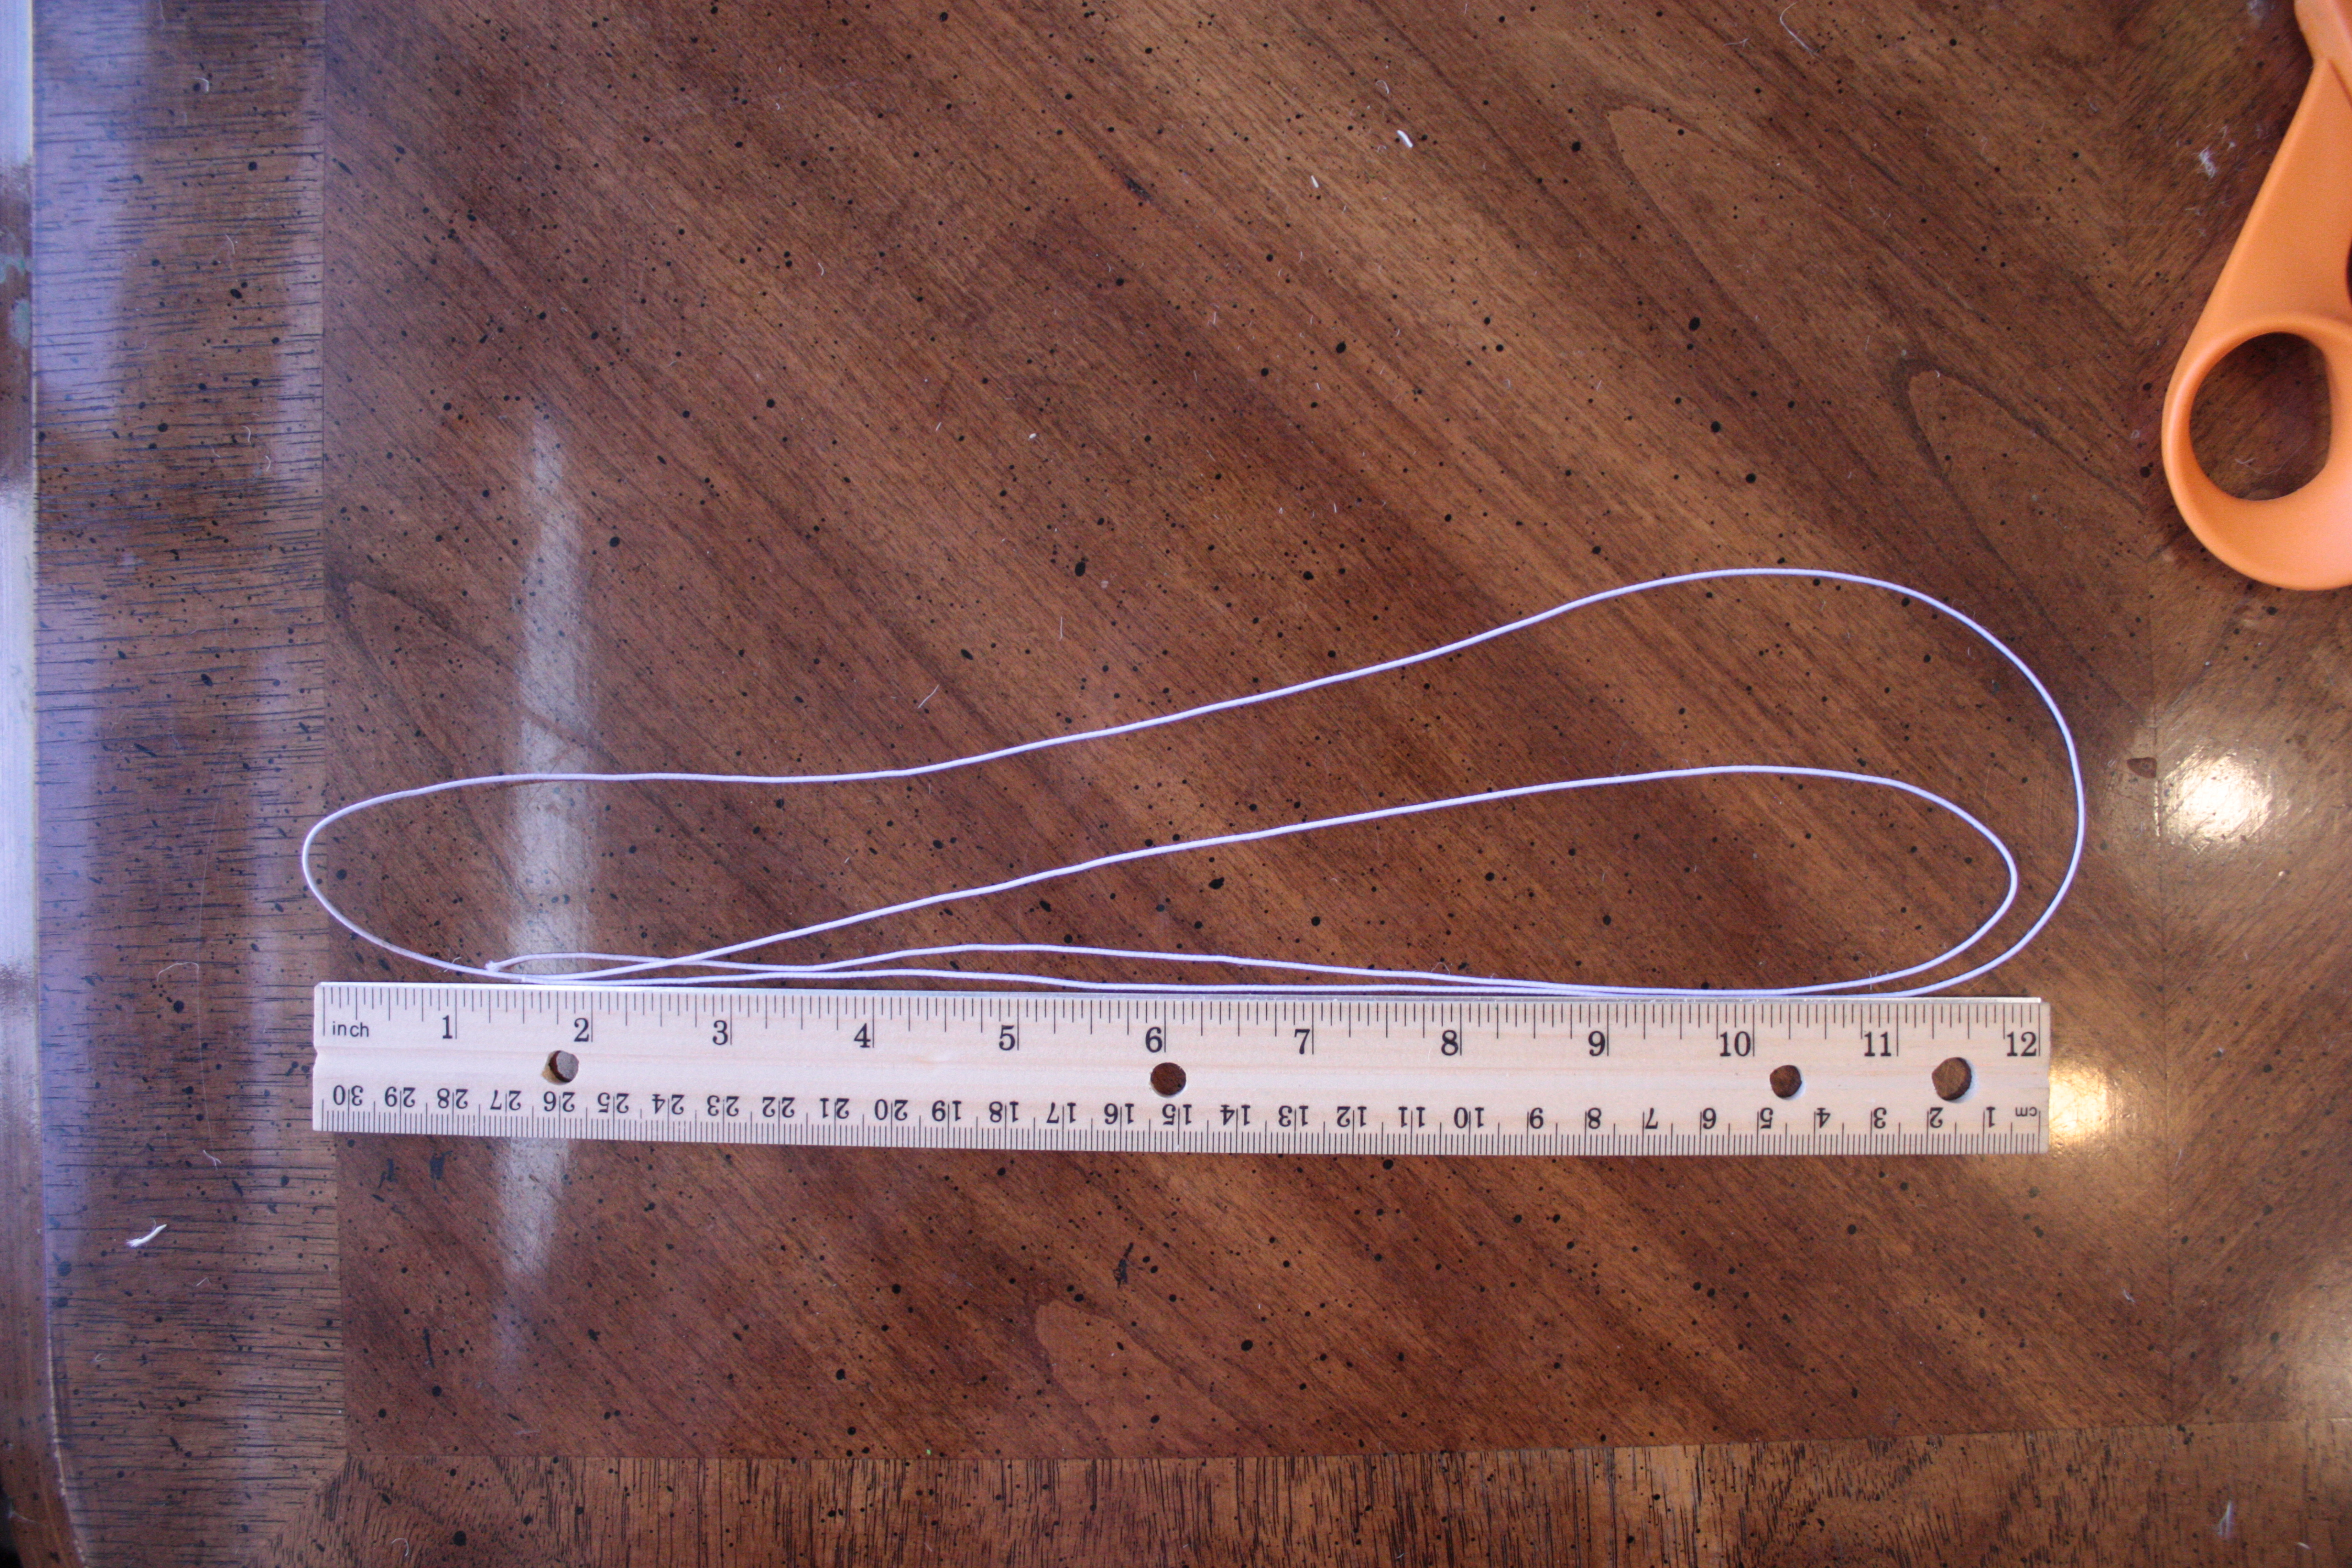
Measure Your Cord
Measure and cut a length of cord that is 48-inches long. You need a really long cord because you will be weaving it in and out of beads.
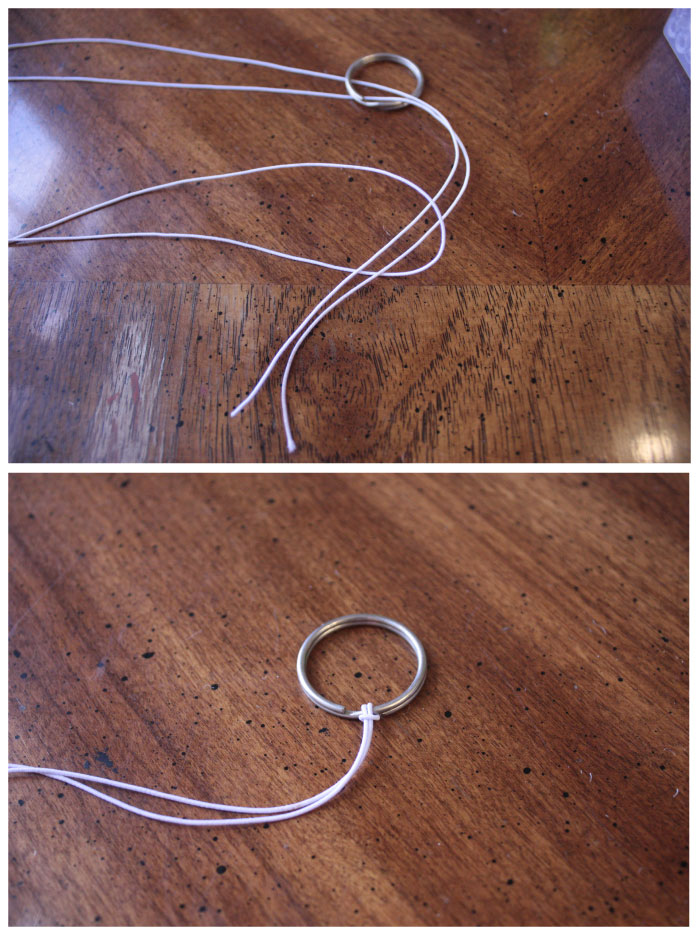
Attach Your Keychain (Optional)
To make a bead-buddy keychain, fold your cord in half. Thread the ends through the keychain ring. Then, pull the ends through the loop at the loop of cord as shown. This will fasten the cord to the ring. You do not have to do this step, but it does make it easier to keep your cords even while weaving. Also you can tape the keyring down so that your bead buddy doesn’t slide around while you are working.
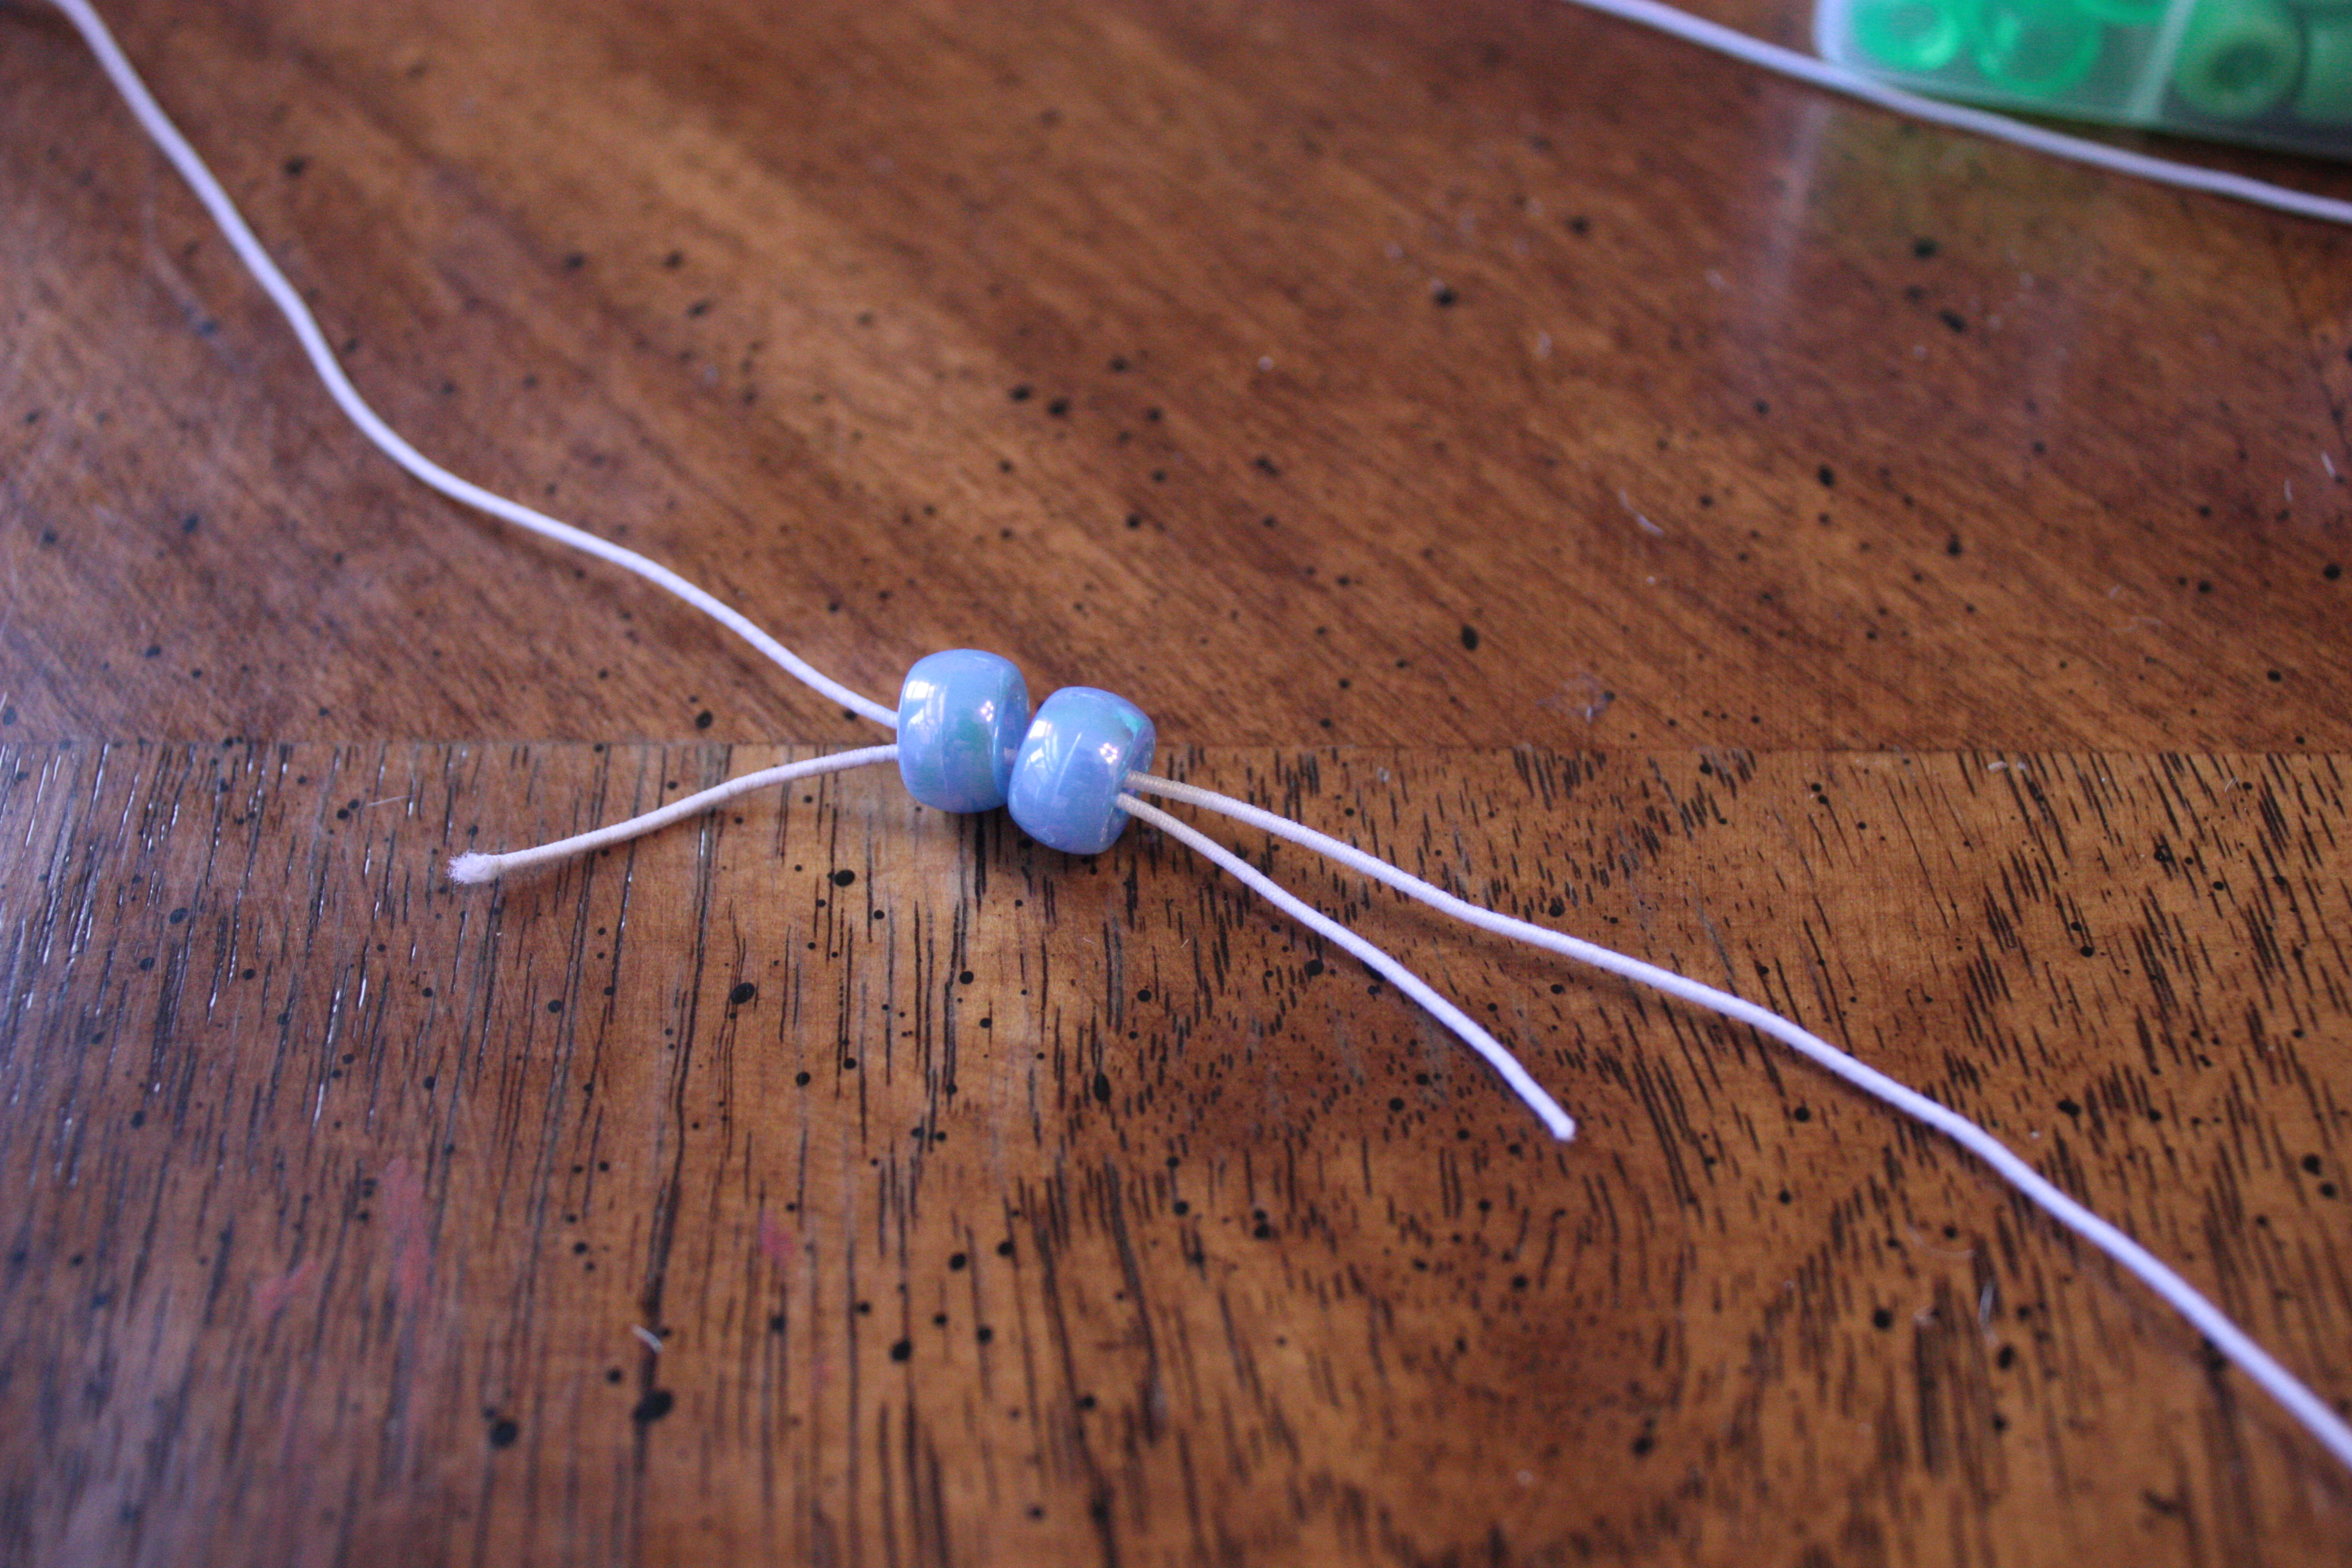
Step 1
Now, you are ready to start your dragonfly. Choose which color you would like to use for the main body. Make sure you have plenty of these beads because they will make up most of your buddy. Slide two beads on one end of the cord. Then, slide the other end of the cord through the beads, going in the other direction. This will make your cords cross through the beads as shown. Pull both ends of the cord to slide your beads up to your key ring. If you did not use a key ring, pull your ends equally so that the beads end up in the middle of your cord.
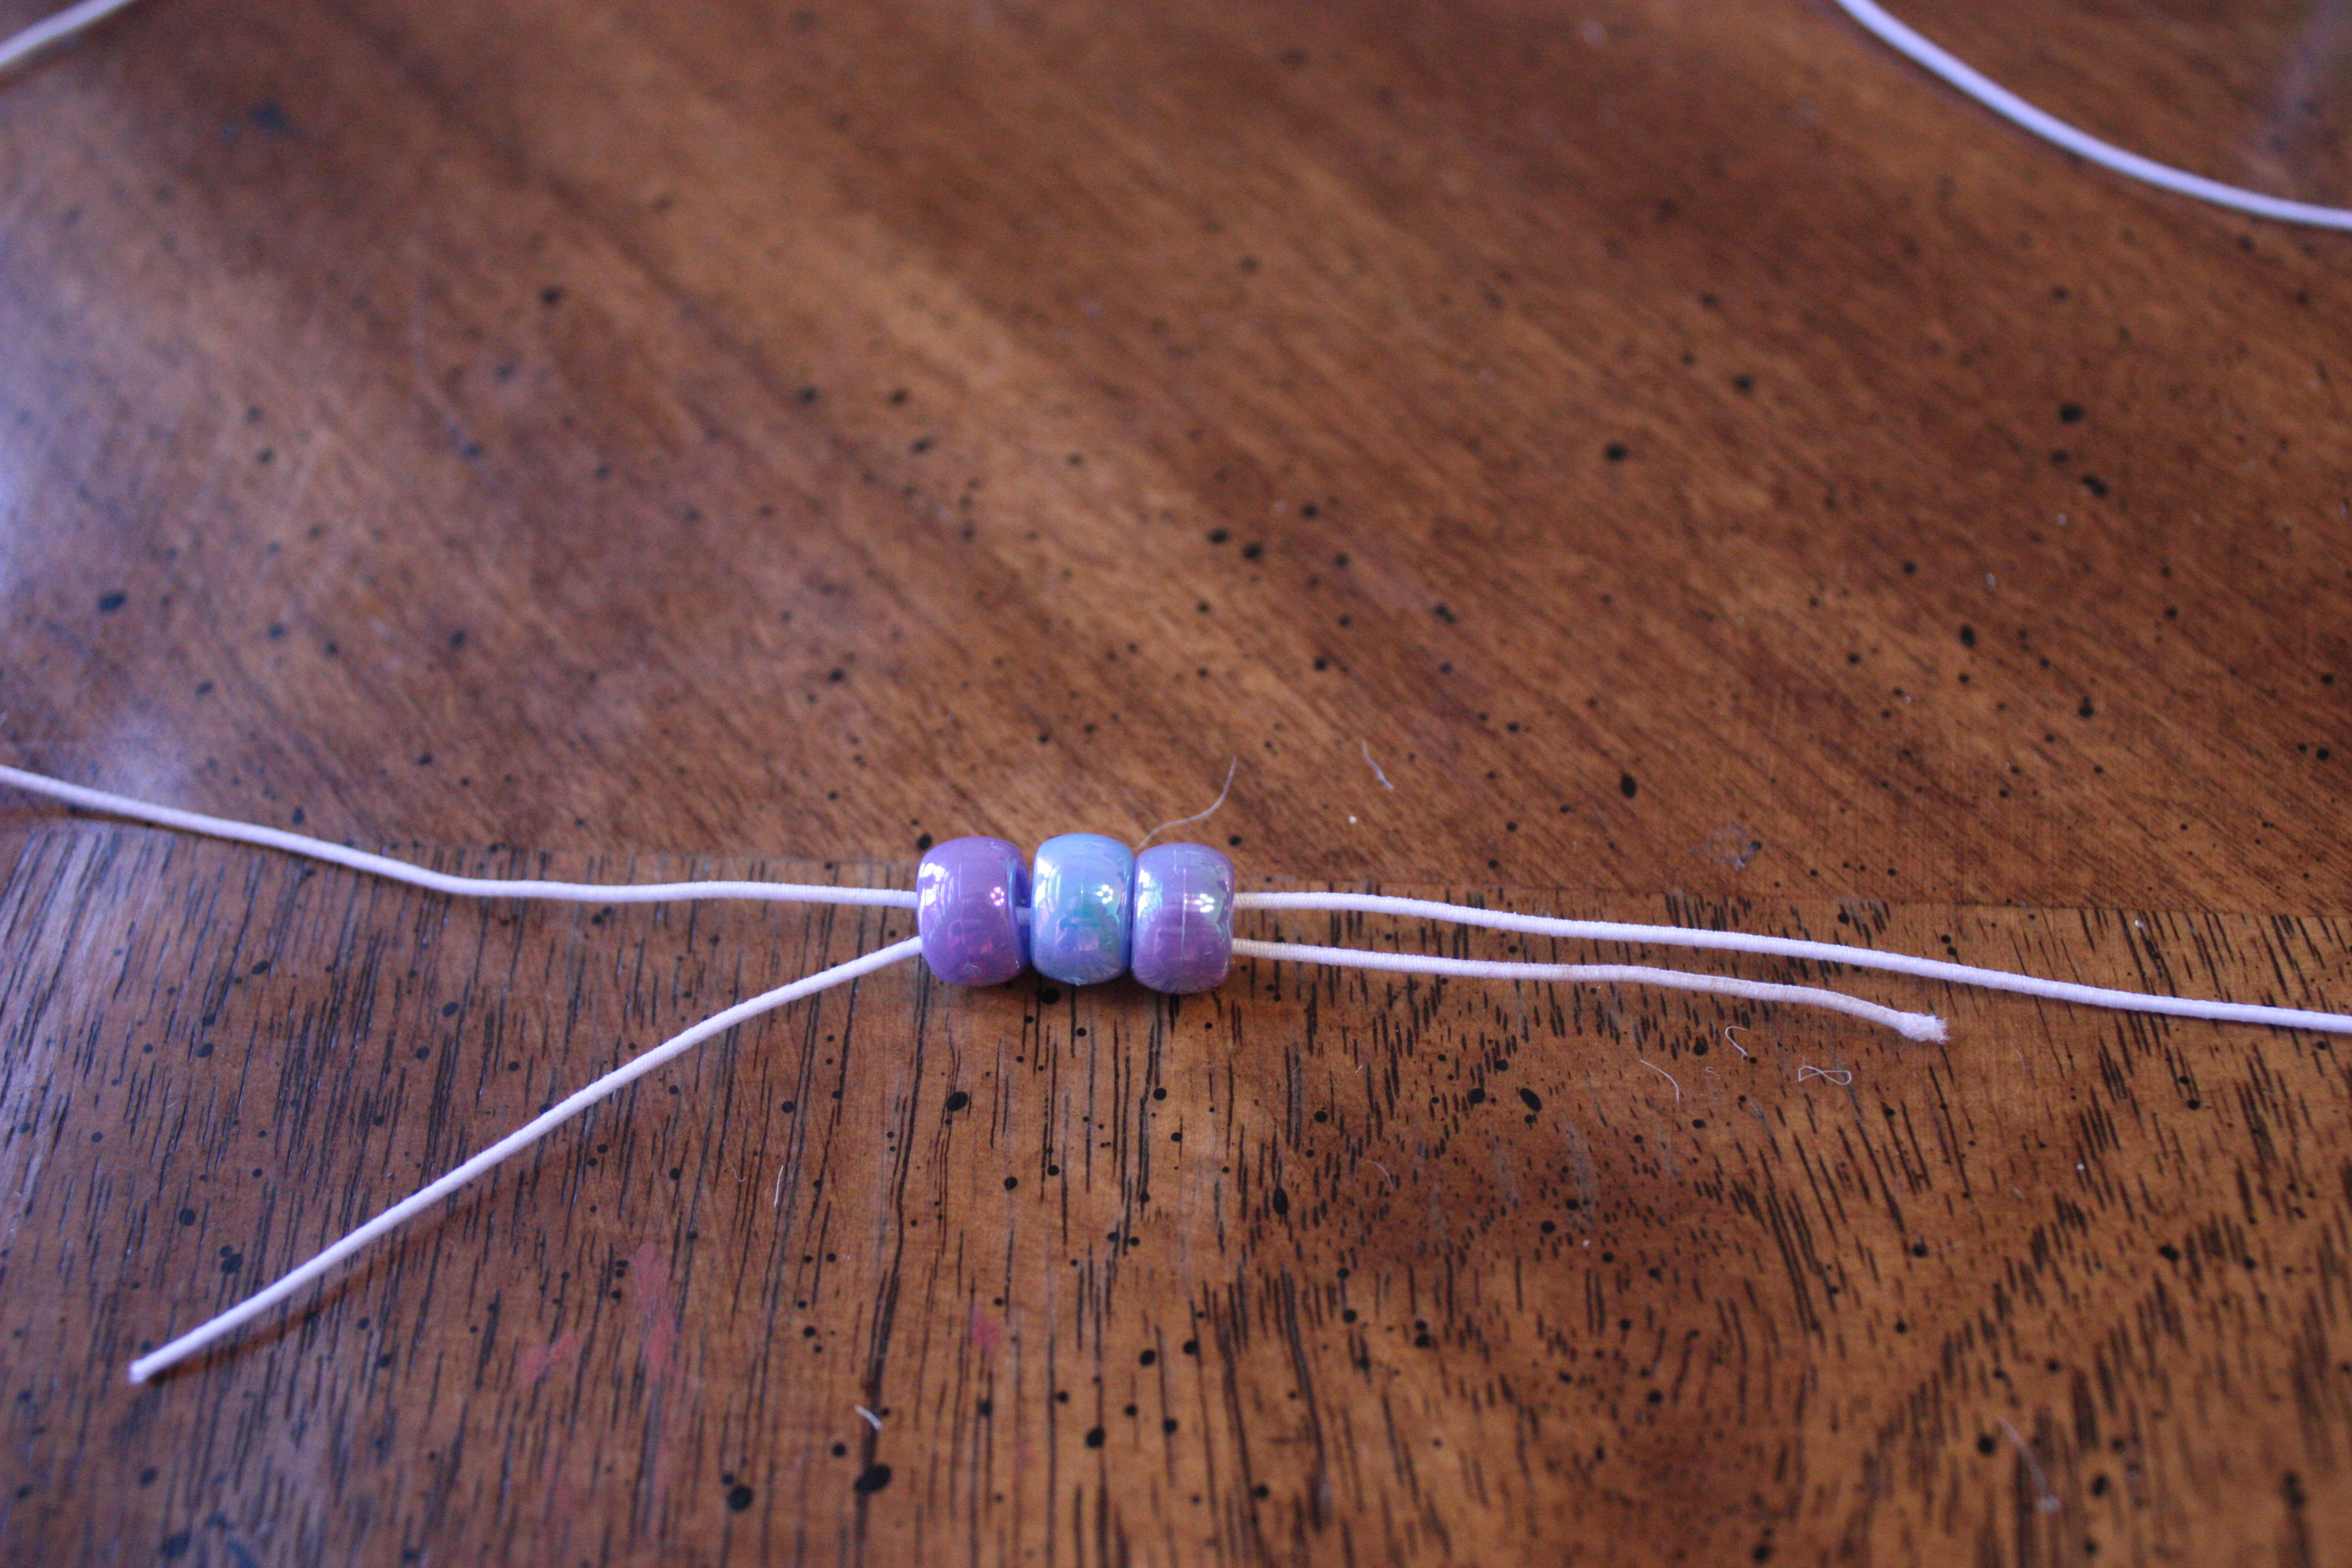
Step 2
Next, add three beads. The beads on the outside will be your dragonfly’s eyes, so they should be a different color from its body. Again, thread both ends of your cord through the beads so that they cross. Pull the cord ends until this row of beads meets your first row at the top.
Step 3
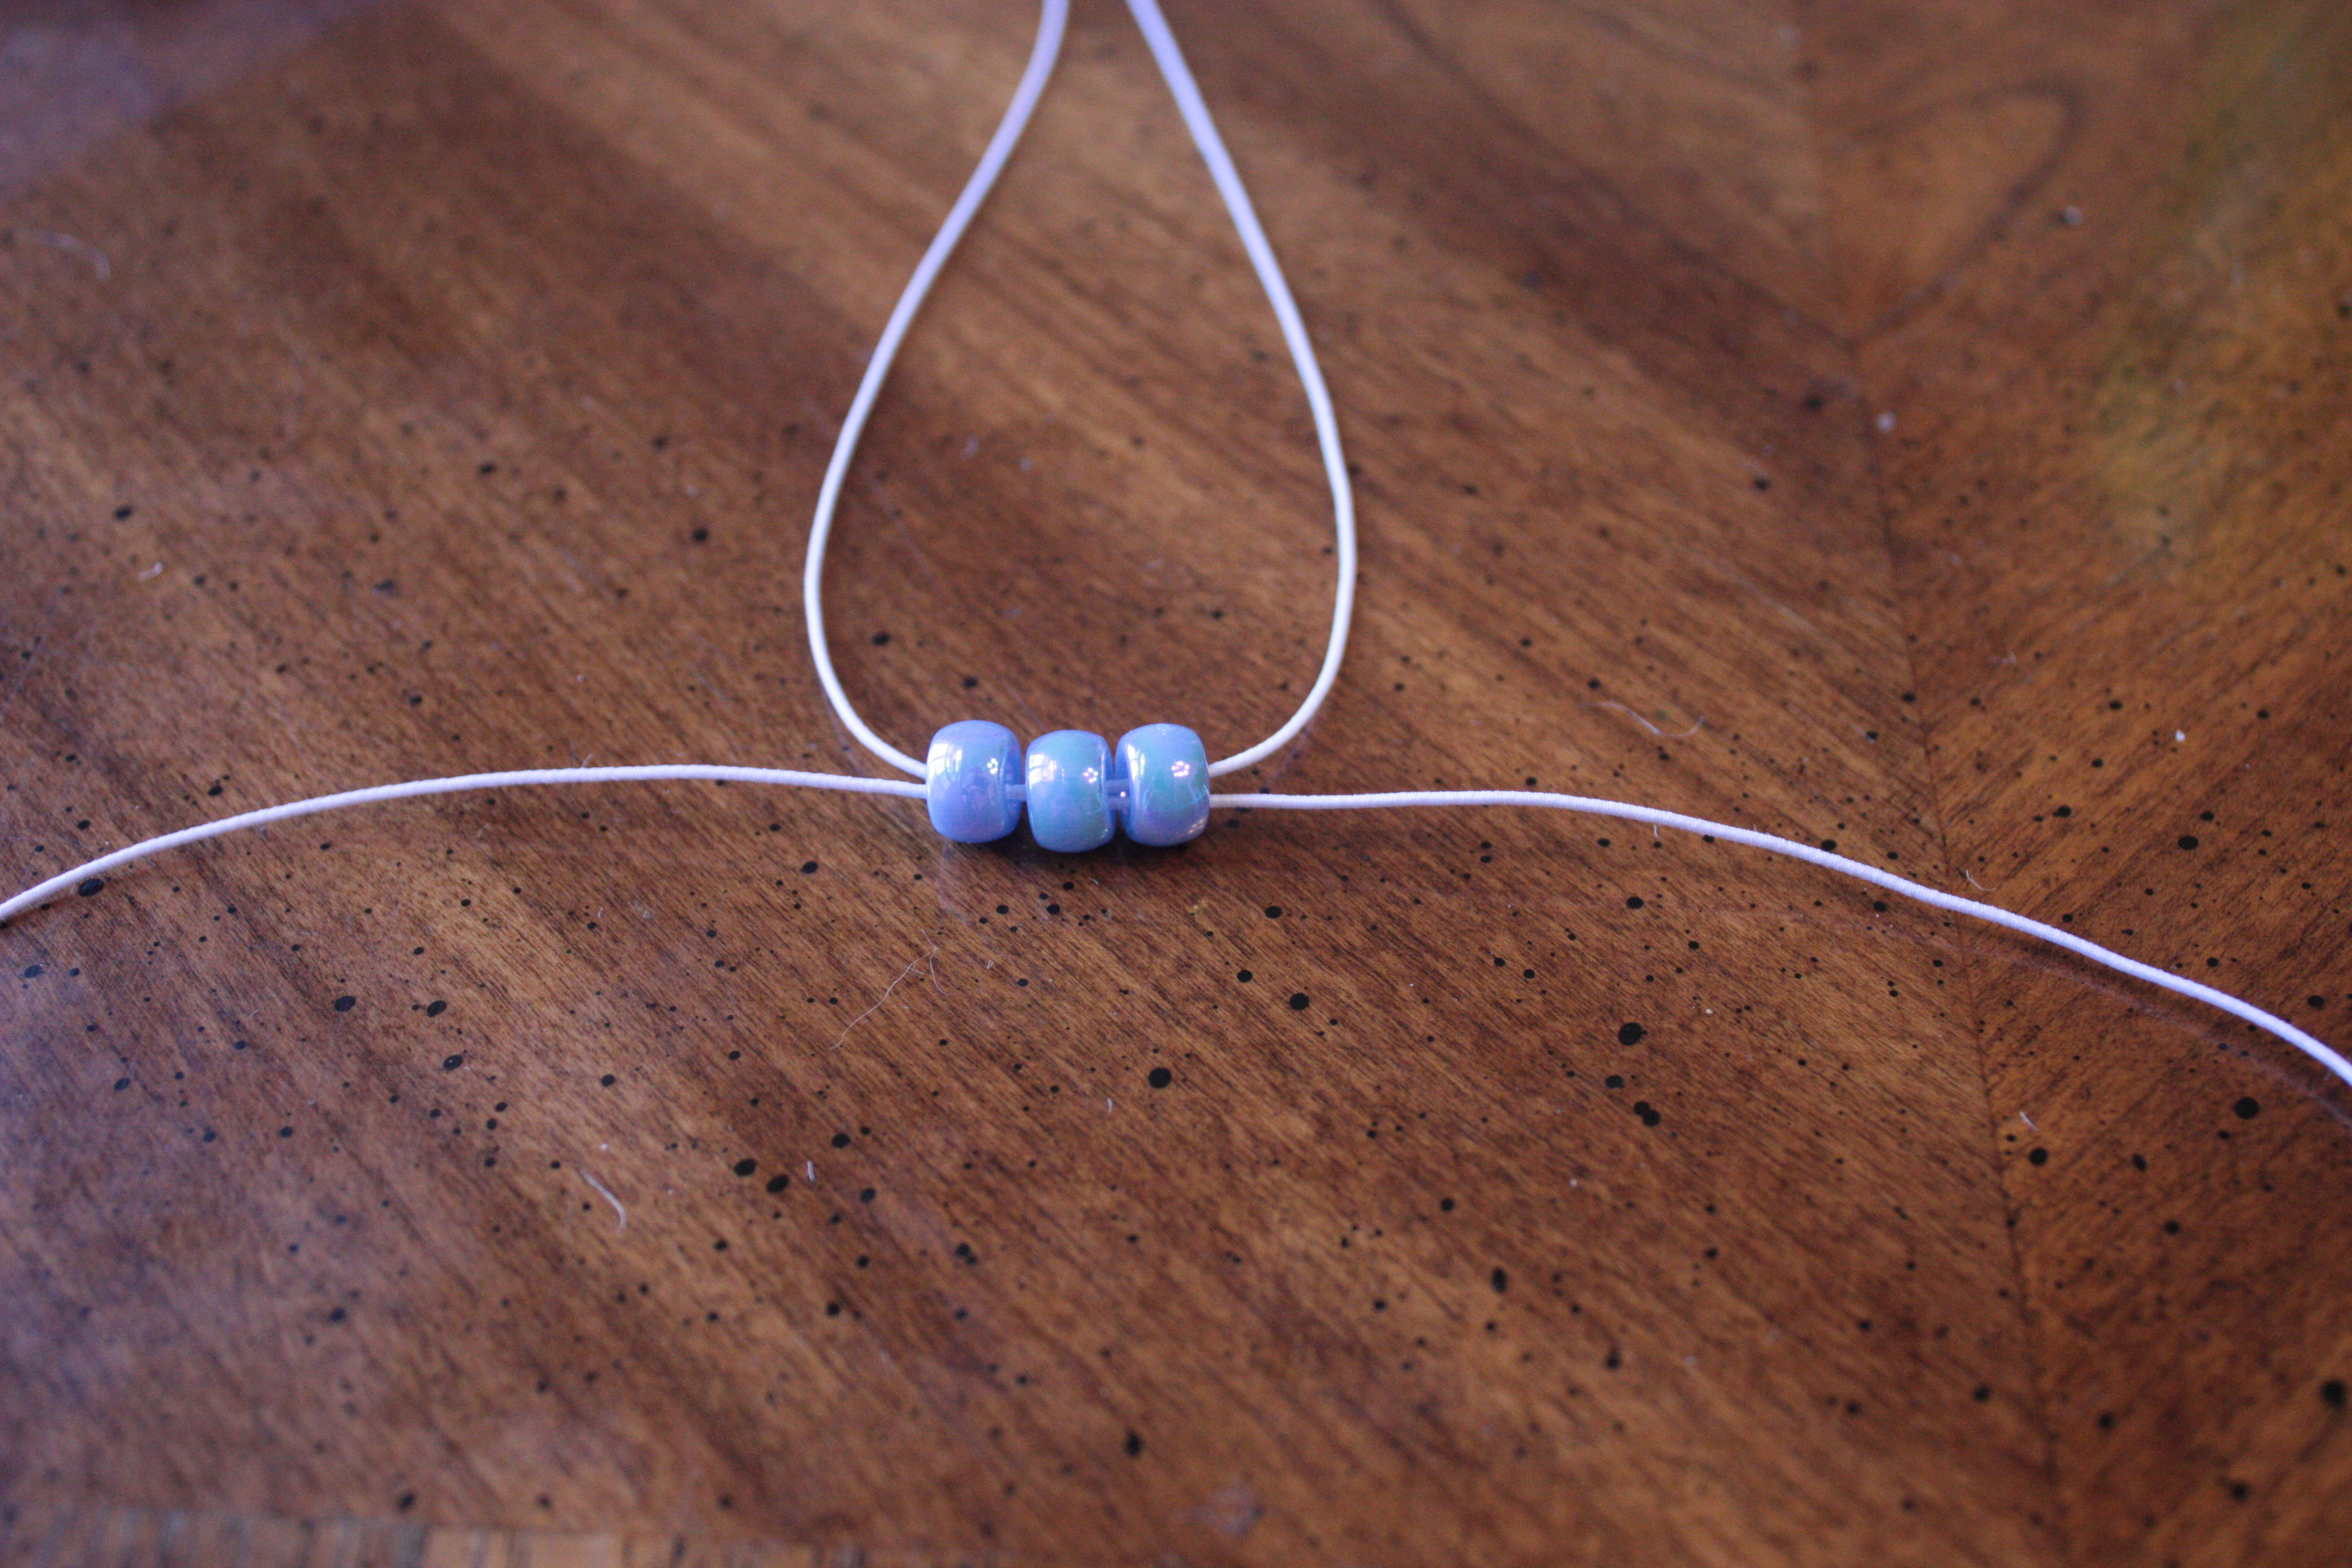
Now, add three beads that are your main body color. Thread both ends through and pull up to the top. You have finished the dragonfly’s head!
Step 4 (Wings)
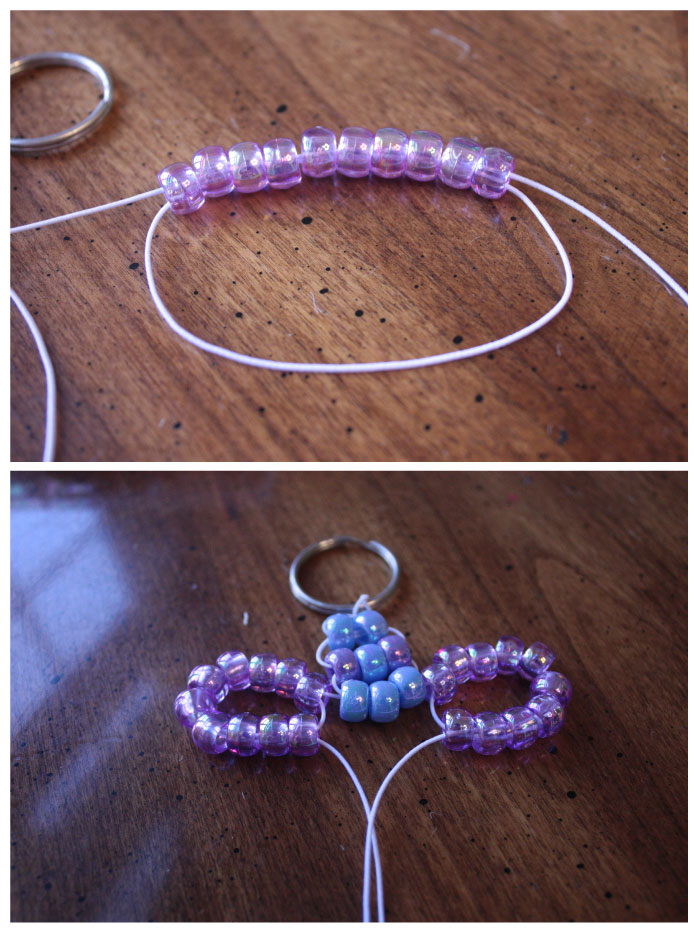
Now it’s time to create the first set of wings for your dragonfly. Thread 10 beads of a new color on one cord. Then, loop the cord back around and thread it through the beads again. Look at the picture to see how. Pull the cord tight until the first and last beads meet and make a circle. Do the same thing on the other side so that you have two wings.
Step 5
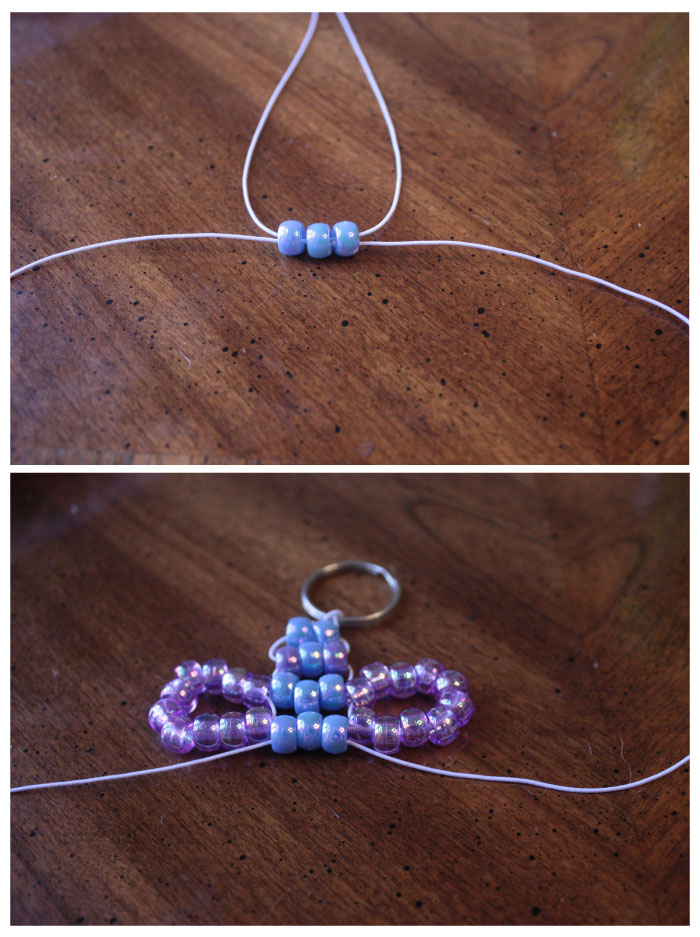
Thread 3 more body-color beads on to one end of the cord. Attach these the same way you did before, by crossing the cords through the beads and pulling the ends until the beads reach the base of the wings.
Step 6
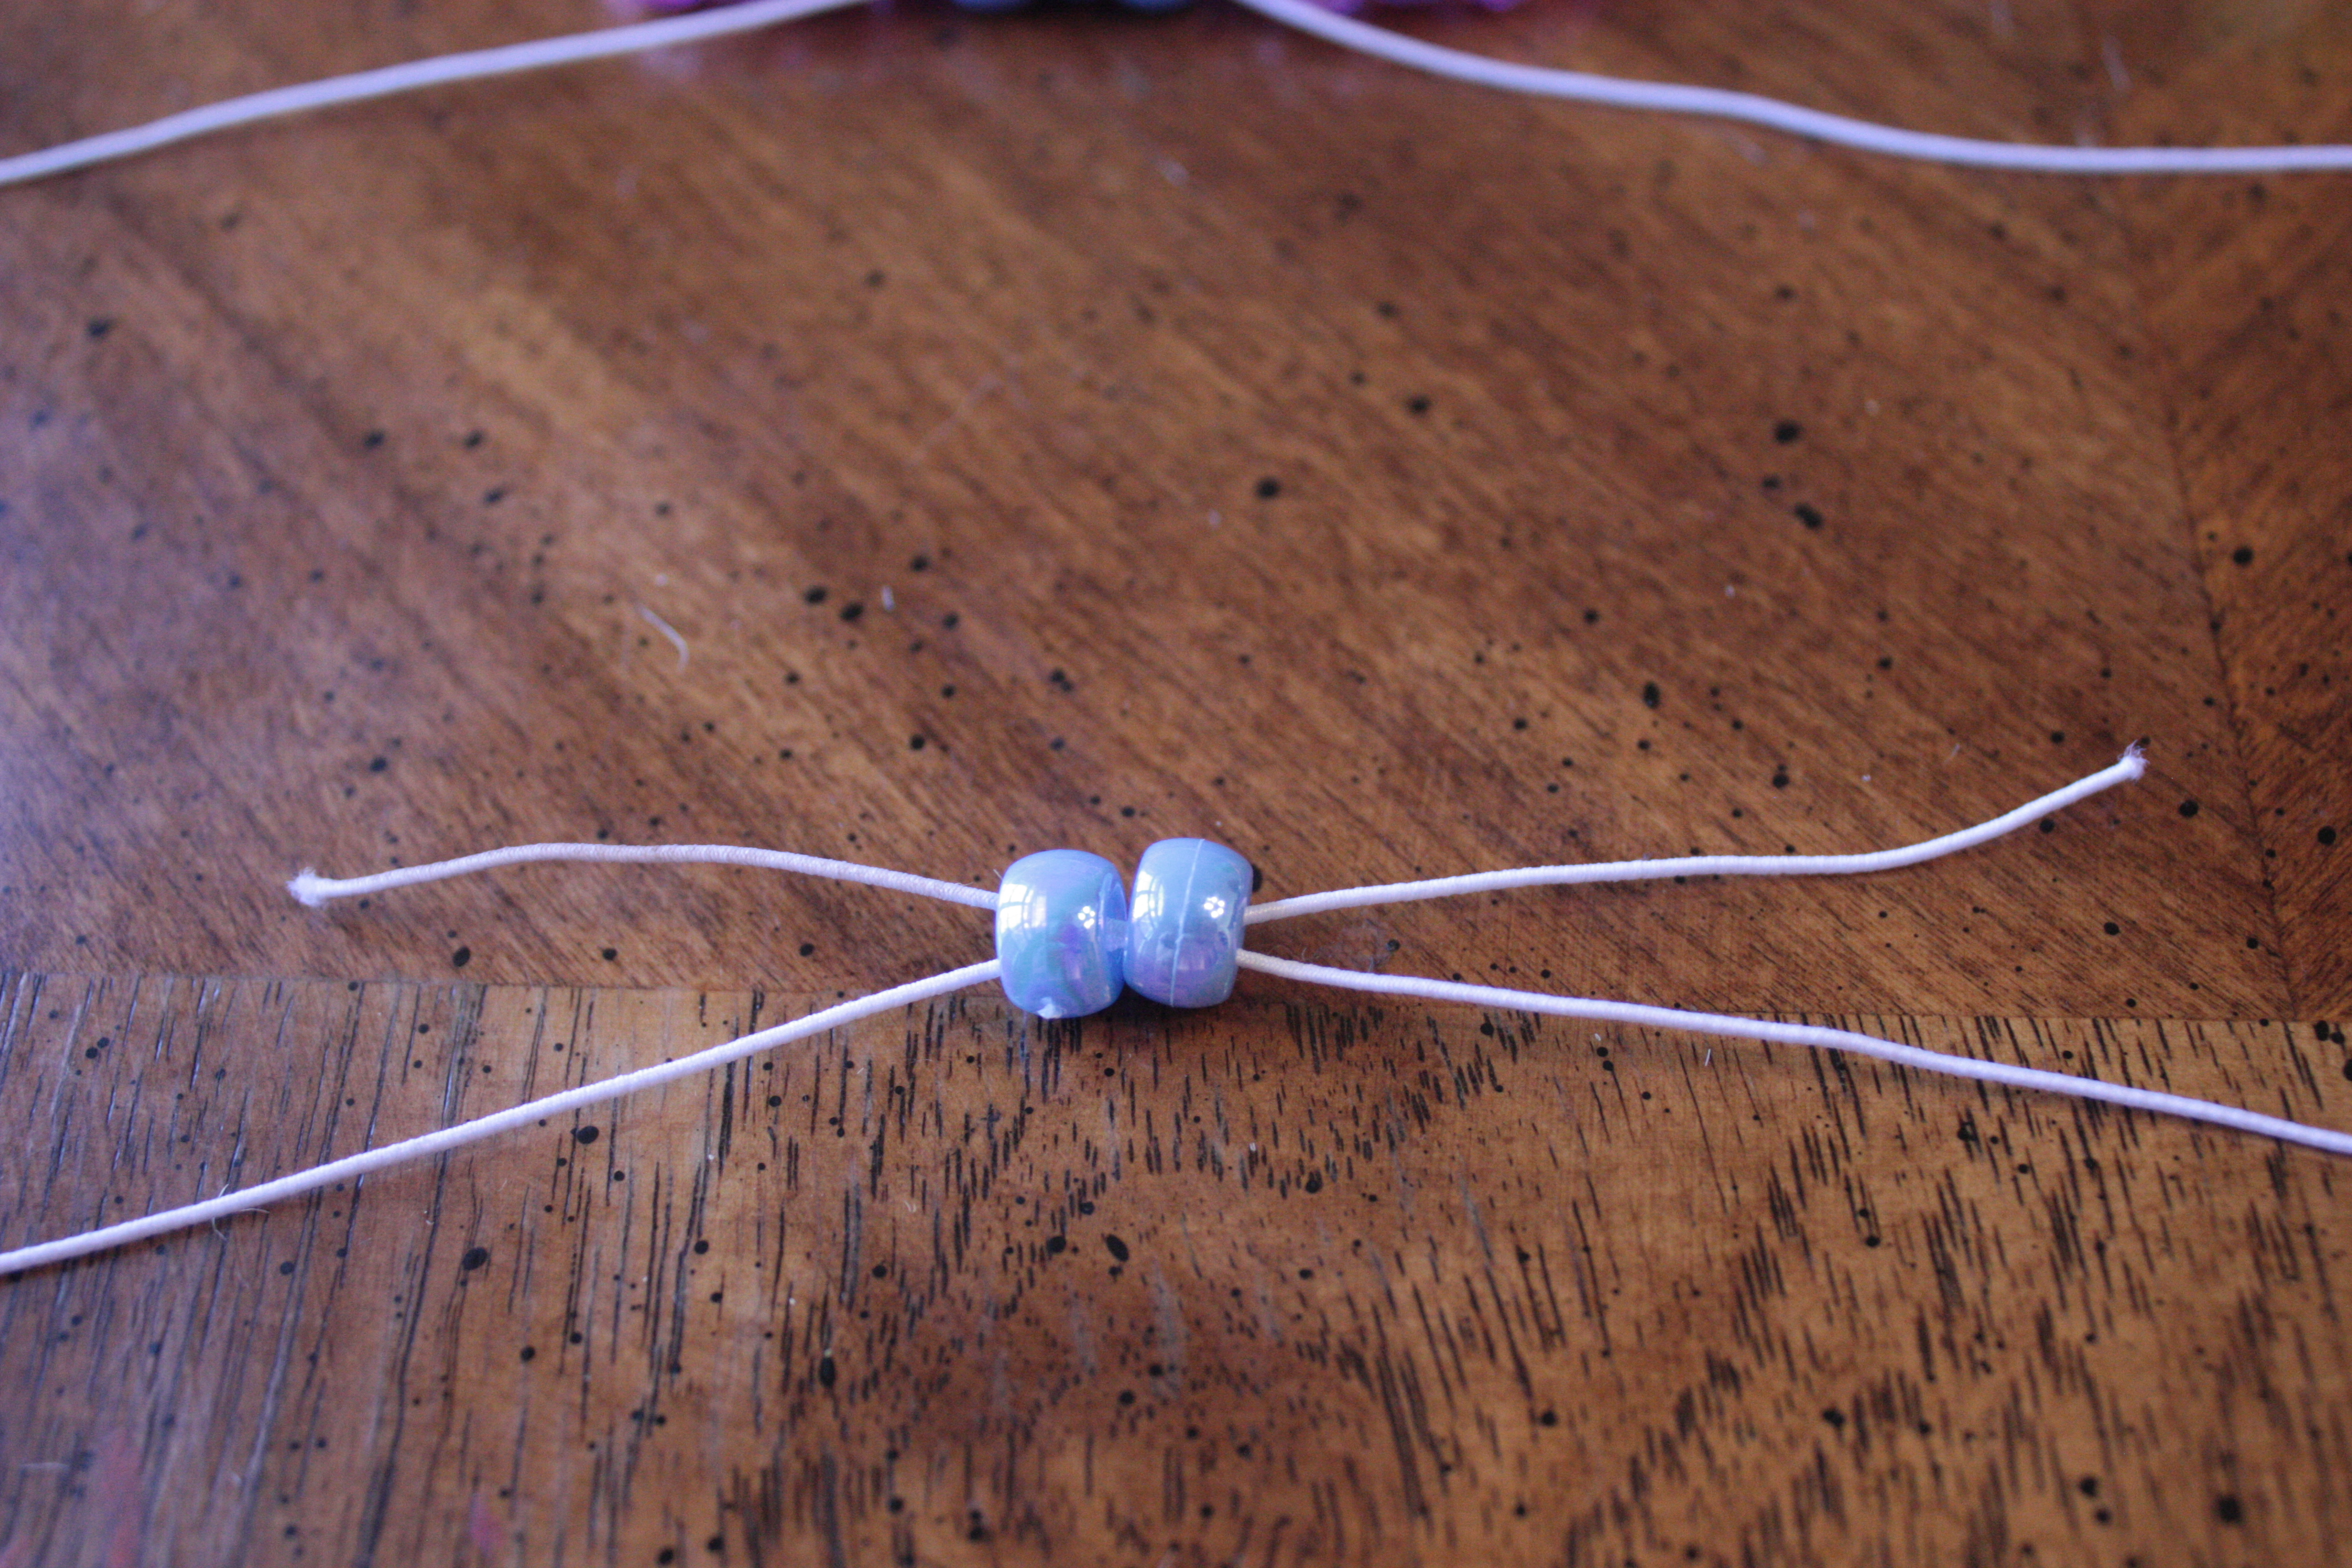
Next, attach 2 body-color beads the same way you did the last three. Cross your cords through the beads and pull until the beads meet up with your dragonfly’s body.
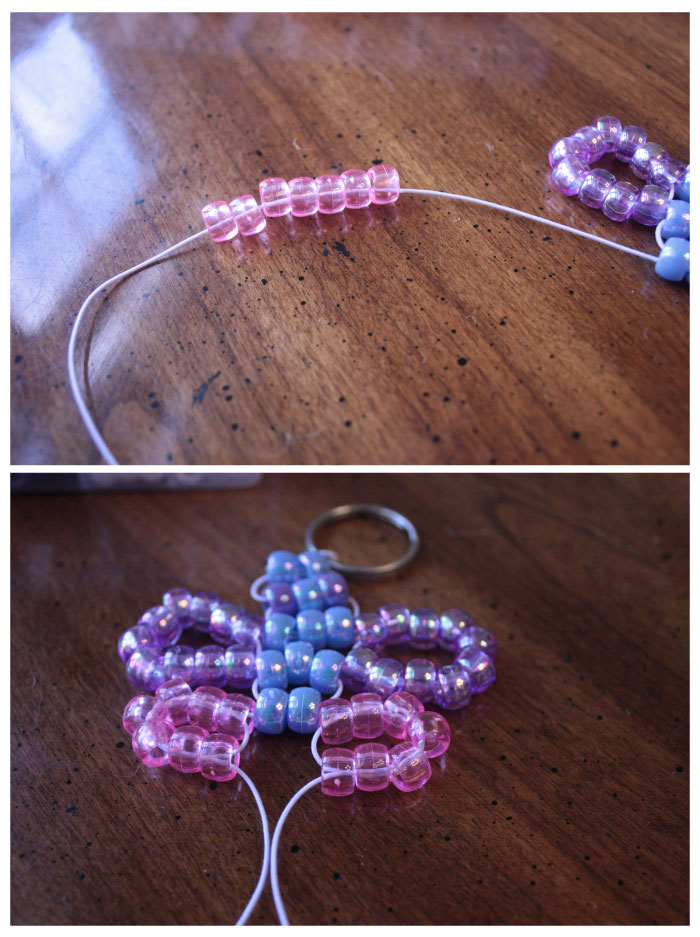
Step 7 (Second Set of Wings)
The second set of wings are made the same way the first set was. This time you will use 7 beads instead of ten. Thread the beads on one cord and then loop that same cord through the beads again. Pull the cord until the beads make a circle. Do the same thing on the other side.
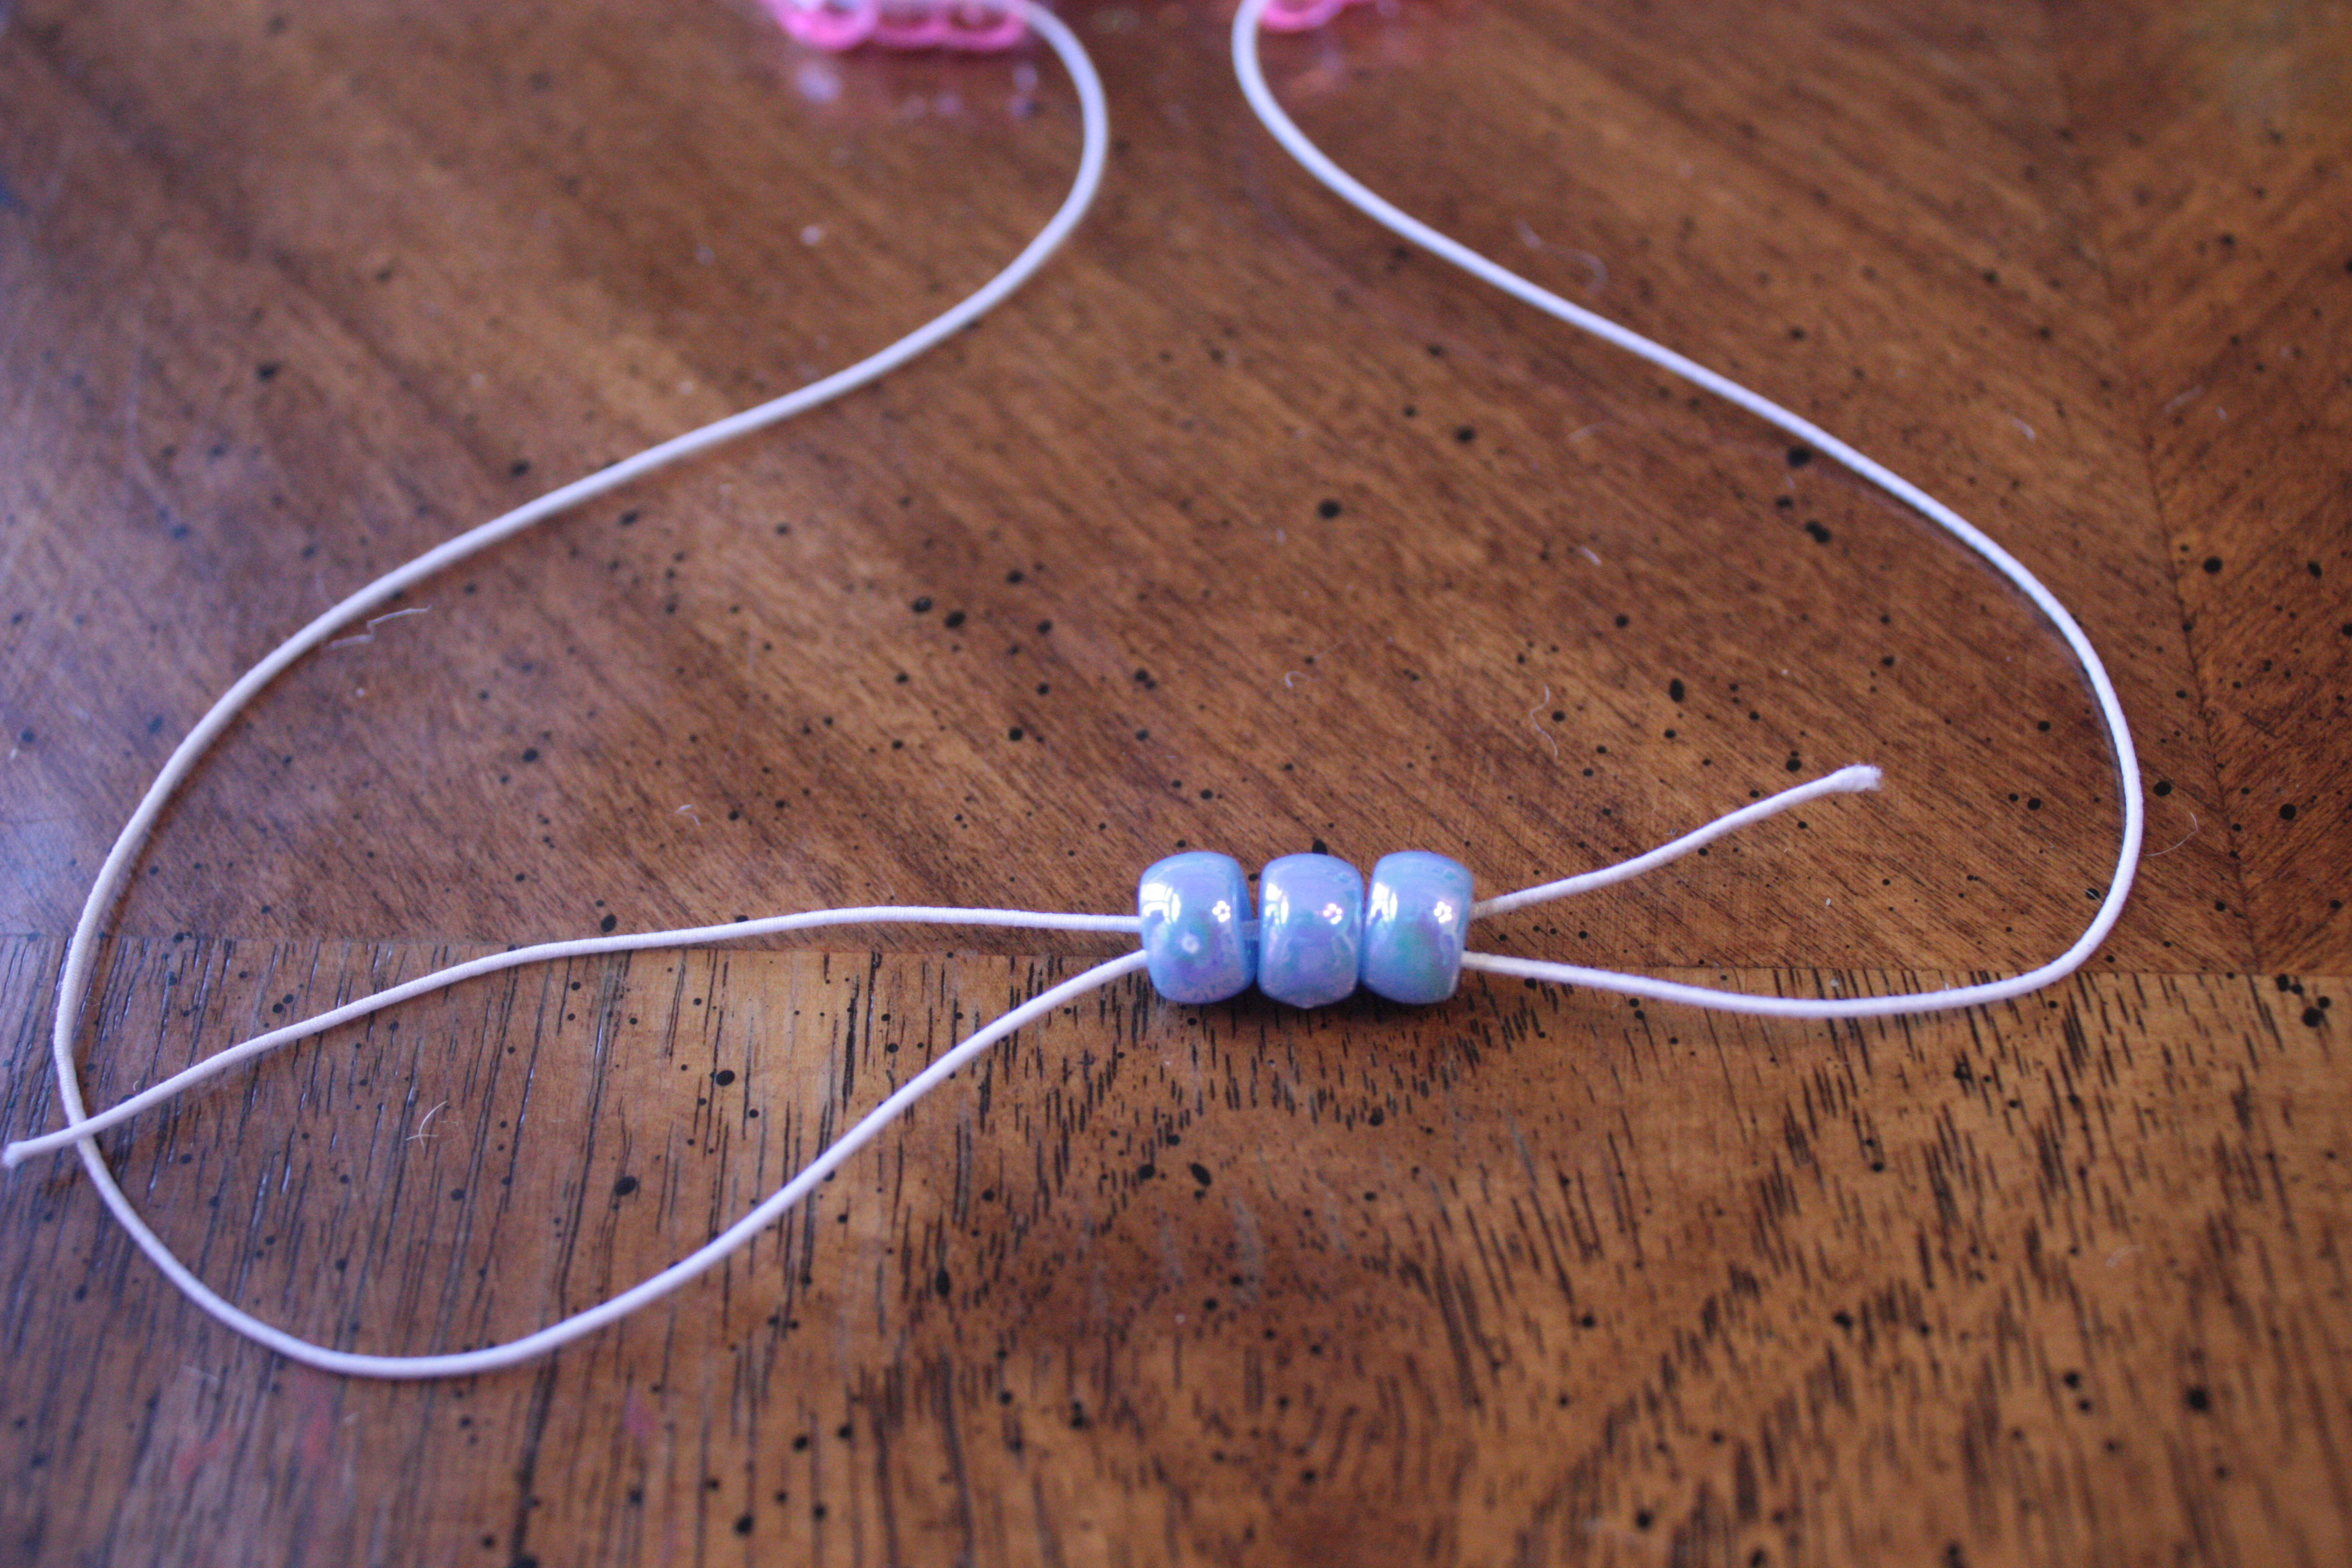
Step 8
Thread another 3 beads on one cord. Cross your cords through the beads and pull them up to the base of your wings. This keeps the wings in place.
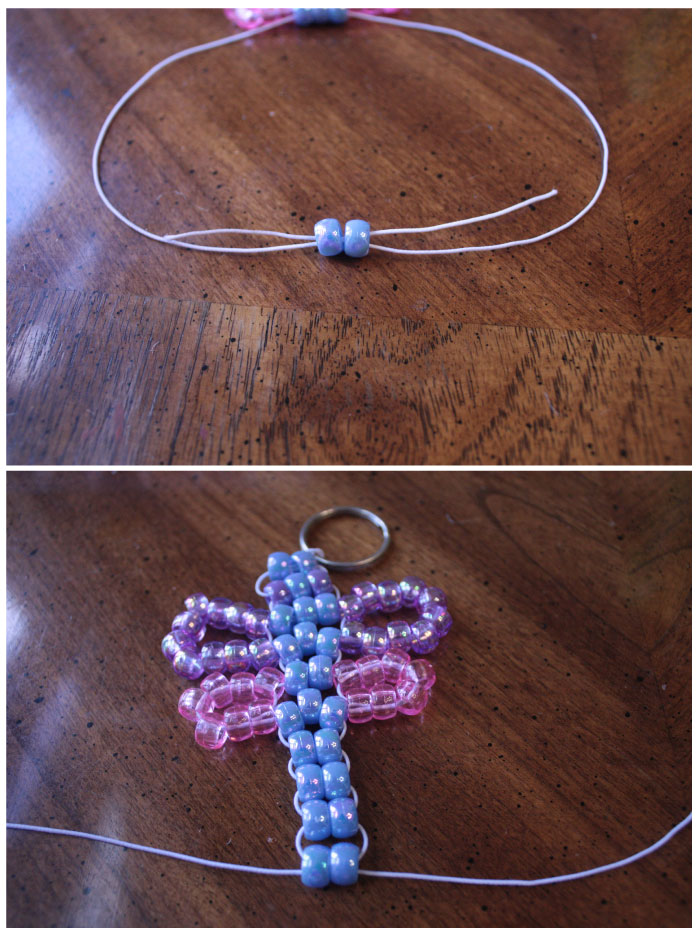
Step 9 (Finish the Body)
Thread 2 more beads on one cord. Cross your cords through the beads and pull them up to meet the other beads. Repeat this step three more times to finish the body of your dragonfly.
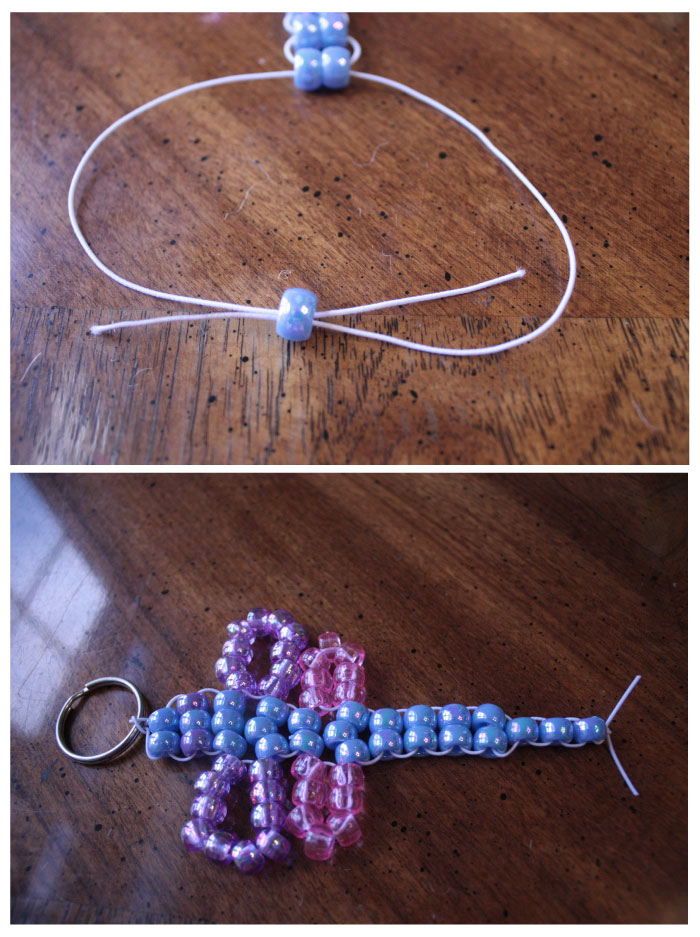
Step 10 (Finish)
Thread one body-color bead on one cord. Cross your cords through the bead and pull it up to meet the rest of your dragonfly. Do this step two more times to finish its tail. Then, tie a double knot after the last bead and trim your cords. You finished the dragonfly!
Did you make the dragonfly? What was it like to weave beads? Was it easy or difficult? If you enjoyed it, maybe you want to try the more difficult dinosaur pattern! Send a picture of your finished dragonfly to your teacher.
