Balance is one of those principles that can be used in a variety of ways in visual art. As you look at each artwork below, ask yourself the following questions:
What kind of balance does the artwork have? (symmetrical, asymmetrical, or radial)
Why do you think the artist used that type of balance?
Would you have composed the artwork differently to achieve a different type of balance? Why?
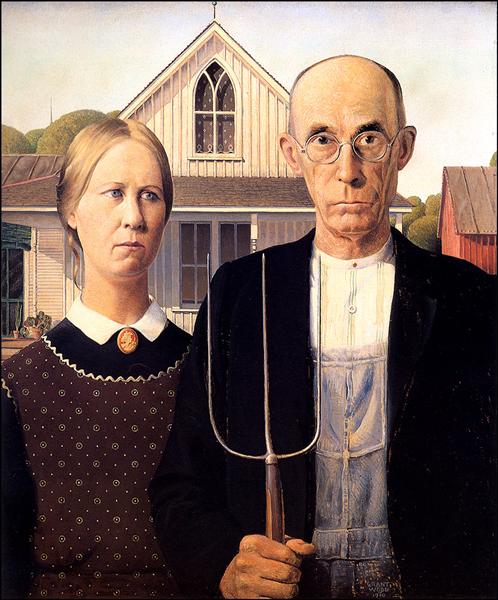
American Gothic by Grant Wood, 1930 This artwork has symmetrical balance because if you placed an imaginary line down the middle, there would be about the same amount of visual weight on each side. This creates a very stable and static (unmoving) composition. The focus is on the hardworking farmers, and the viewer can assume that their day-to-day lives do not vary too much. If Wood had used asymmetrical balance, the people portrayed would not seem as stable, and the artwork would have been more about emotion than the farmers.
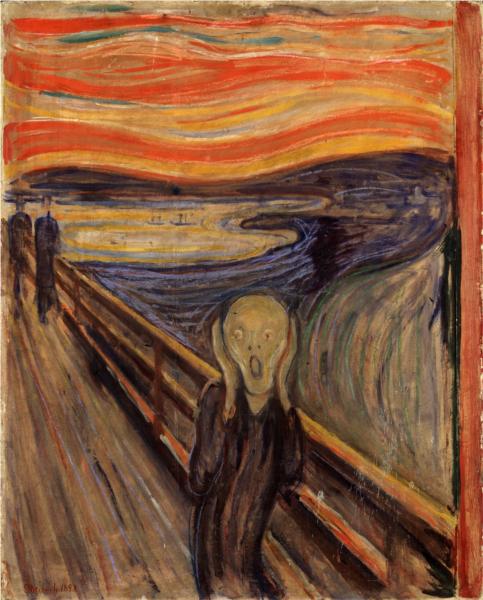
The Scream by Edvard Munch, 1893
The balance in this piece is asymmetrical. Asymmetry helps to make the main figure the focal point while at the same time making the figure seem small compared to the area around it. Munch used the large, swirling bands of color to make it seem like the environment around the person could swallow them up. The focus of this artwork is emotion, specifically anxiety. If the artist had used symmetrical balance, the artwork would have seemed too stable to communicate the emotion of anxiety.
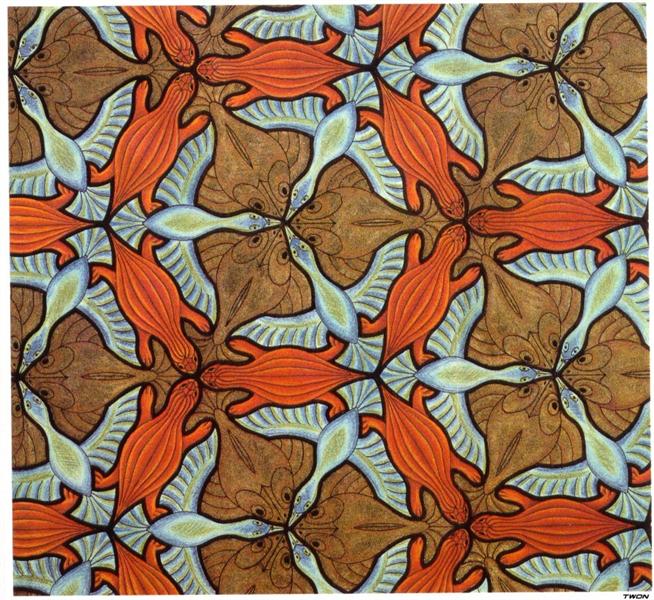
Symmetry Drawing by M.C. Escher, 1948
This drawing by Escher is an excellent example of radial symmetry. Radial symmetry starts at a central location and spirals out. What is amazing about Escher is his ability to create several spirals within his artwork. This kaleidoscope effect would not be possible with any other type of balance.
As you can see, each type of balance is used in specific circumstances and for specific purposes. Each type communicates something different to the viewer, and the types are not interchangeable. Symmetrical and asymmetrical balance are the two most often used. Radial symmetry is seldom used except in the cases of optical art (like Escher’s) and cultural art (like mandalas and aboriginal art).
Text
Guided Notes
Tutor
Video
How To
Meet your new study partner! With our powerful Student Tools, your online learning experience just got more accessible,
personalized, and thought-provoking than ever before!
Do you feel like you learn better when you watch videos? You’re not alone!
Research shows instructional videos can make learners more engaged and active in online classes,
when compared to text-only lessons.
Student Tools lets you turn some lesson pages into videos instantly! Just click the Student Tools tab and select Video.
Remember, video instruction is not available on every lesson page.
Go back to the lesson page any time by closing the Student Tools window.
Sometimes when you learn, it can feel like you’re just not getting it. Maybe you don’t really know what all the words on
the page mean, or you have to read a paragraph two or three times to understand what it’s about.
If this happens to you, just click the Student Tools tab and choose “Text.” This will automatically
simplify the instruction, making it easier to understand and remember.
Go back to the lesson page any time by closing the Student Tools window.
The science is in, and taking notes is one of the best ways to reinforce your learning.
Notes work even better when you write them by hand, since you’re more likely to put complex new ideas
in your own words and remember them longer.
You can quickly and easily access guided notes, as well as key lesson vocabulary,
by clicking Student Tools > Notes. Choose a PDF or Word Doc,
and fill them out online -- or even better-- print them out and take notes by hand!
Go back to the lesson page any time by closing the Student Tools window.
Imagine a teacher you can contact anytime, who is happy to answer all your questions and
knows pretty much everything in the world about the subject you need help with.
Say, “Hello!” to your Tutor! Click on Student Tools > Tutor, and ask any question about your class.
Your Tutor is super smart! You can ask the Tutor to explain things more clearly, make connections
between ideas, or even give you custom quizzes and feedback. You can click the links under References to learn more.
Go back to the lesson page any time by closing the Student Tools window.
Student Tools lets you create your own Flashcard decks to help you study. To get started, click Student Tools >
Flashcards. Press Add New Set and give it a title.
Now, decide what will be on the front and back of your first card. It can be a term and definition, a challenging question,
or even a funny phrase that helps you remember something. Click Add Card to Set to make a new Flashcard.
You can delete sets or cards by clicking the trash can icon. When you’re done, click Save Cards to Set.
Now you can Review your deck. Read the front of the card, and think of the answer. Even better, say your answer out loud! Then, click the card to flip it over.
Depending on how you did, you can either keep that card in the deck to study again by clicking Next or Previous, or if you got it right, click remove.
Remember to review your flashcards often, space out study sessions, and keep practicing until you know them all!
Go back to the lesson page any time by closing the Student Tools window.