Review the rubric below to see how you will be graded on your assignment for this lesson. It will be helpful to know how your project will be graded before you start working through each step.
| Superior 5 points |
Average 3 points |
Poor 1 point |
|
|---|---|---|---|
| Craftsmanship | Your final project shows considerable attention to using crayons or color sticks. There are no stray marks or smudges. | Your final project shows an attention to using crayons or color sticks. A few barely noticeable stray marks or smudges. | Your final project was put together sloppily. Smudges, stains, rips, uneven edges, and/or stray marks are evident. |
| Composition | The objects in your design are different sizes and interesting shapes. They are arranged and shaded well, some in front and some behind. | The objects in your design are slightly different sizes and shapes. They are are arranged and shaded with some items in front and others behind. | Objects are similar sizes and/or shapes. It appears little attention was given to designing the still life. |
| Use of Values | Your design uses dark, medium, and light values to creates a feeling variation. Objects are colored to show a distinction between objects. | Your use dark, medium, and light values in your design is good and somewhat varied. There is some distinction in the design between objects. | Use of dark, medium, and light values is poor and uniform. There is no sense of distinction in the design between objects. |
| Use of Textures | Your design uses a variety of interesting textures that shows exceptional effort in completing your project. | Your design uses a variety of textures that shows an effort in completing your project. | Your design uses similar textures that shows minimal effort in completing your project. |
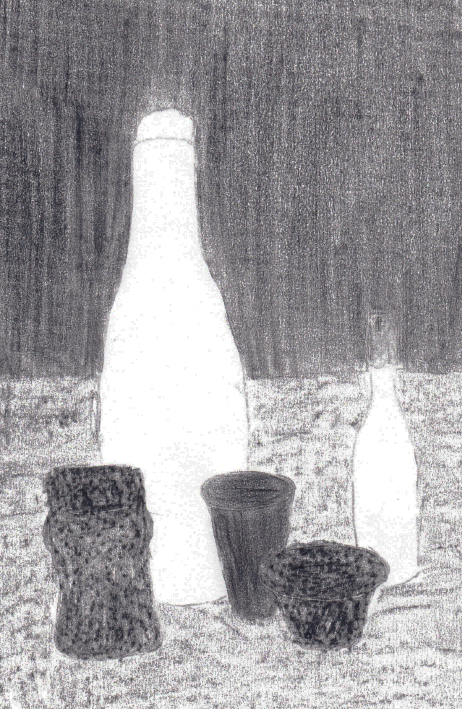
 You will be using your still-life as your foundation for your upcoming projects. Use a light pencil to outline the same cut paper still life that you updated from previous lesson. Draw on your white drawing paper within a margin line of 10” x 6”. This time make the light, dark, and medium tones by rubbing these areas of the picture with a black crayon or color stick over various textured surfaces.
- Study your value scale of texture patterns from your previous course work. Choose the darkest texture for the darkest tones in your still life. Place the paper on the textured surface and rub in the dark shapes with that textured surface. Continue with the other dark shapes with another equally dark texture. Make these tones very dark by applying pressure with a crayon or color stick.
- Find the lightest tone on your texture value scale and fill in all the light toned shapes of your still life with that rubbed texture pattern. Keep this tone very light by using less pressure.
- Now find one of your middle-tone texture, and finish filling in all of the gray-toned shapes of the still life. (Be sure that every area of your picture is filled in with the same light, medium, or dark value tones as your cut paper design.)
- Try to make each rubbed pattern such a distinct dark or light tone that the light objects will show up clearly against a darker background, and the dark objects will show up clearly against a lighter background. No dark outlines will be needed to make the objects visible.
